Easiest Ways to Remove Watermarks from GIFs With the Top Used Tools
Since GIFs began to emerge, many people have used them on social media, making them a popular media format. You can save GIFs from the internet easily. However, some GIFs have watermarks embedded in them. So, if you want to save a GIF with a watermark, the best way to do it is to remove the watermark on the GIF. To do that, you need apps that will help you remove watermarks easily. But do not be anxious, because we will help you with that matter. We searched for the most outstanding watermark remover tools and picked the best among them. Therefore, finish reading this article to learn how to remove watermarks from GIFs.

Part 1. How to Remove Watermarks from GIFs Online
If you want a convenient way to remove watermarks from your GIF, you probably want to try using an online tool. Online tools are convenient because you do not need to download anything on your device. So, if you want to remove watermarks from your GIFs online, read this part.
EzGIF is an online software application mainly used for adding watermarks and creating GIFs. Many users don't know that it can also remove watermarks from GIFs or videos, as long as the watermark is on the side part of the video. Despite not having a built-in feature to remove watermarks, you can use the crop tool to remove watermarks on your GIF. Furthermore, it has many editing features, such as rotating, resizing, adding text, etc. EzGIF is also a good GIF resizer. It has a user-friendly interface, making it easy for beginners to use. It also has a user-friendly interface, making it easy for beginners to use. In addition, you can access it on almost all web browsers, including Google, Firefox, and Safari. However, it contains pesky ads that might distract you.
Step 1On your browser, search ezgif.com, and go to their webpage. On the software's main interface, click the Choose File button, then click Upload.
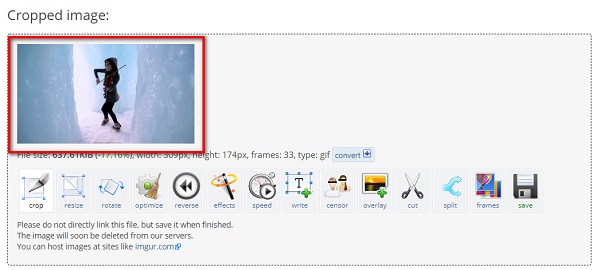
Step 2Next, click Crop on the editing options above the software's interface. Then, adjust the crop box and exclude the watermark on your GIF. You can also choose the aspect ratio you want to have in your GIF. Tick the box on what size you prefer.

Step 3And then, scroll down a little and click the Crop Image button to remove the watermark on your GIF. Then, you will see your cropped GIF without a watermark.
Part 2. Professional Way to Remove Watermark from GIF Using GIMP
Using an online tool may be convenient, but it does not have many features. So, if you want a more professional way to remove watermarks on GIFs, you can use this recommended pro-app that many professionals use to remove watermarks.Moreover, this program can also reverse the GIF after you remove the watermarks.
GIMP or GNU Image Manipulation Program is a free photo editor that people use as an alternative to Adobe Photoshop. Like Photoshop, GIMP also produces high-quality outputs and has many tools that can be used. However, the advantage of GIMP over Photoshop is that GIMP is free to download and is not preloaded with plug-ins. In addition to that, you can use GIMP for editing, drawing, removing watermarks, and graphic purposes. But, in using this app to remove watermarks on your GIFs, you need to use the Resnythesizer or Smart-remover plug-ins.
In this part, we will let you know how to remove the watermark on your GIF using the Resynthesizer plug-in. Read the steps below to learn how.
The Resynthesizer plug-in is one of the most used plug-ins on GIMP because it supports several editing tools that you can use. Using the Heal Transparency tool on the Resynthesizer plug-in, you can remove any watermark on your GIF. To use the Resynthesizer plug-in, install it from the internet.
Step 1Open your GIF on the GIMP by clicking the Open option from the File menu.
Step 2And then, select the layer of the GIF that has the watermark on the Layers Panel located on the right side of the software's interface.
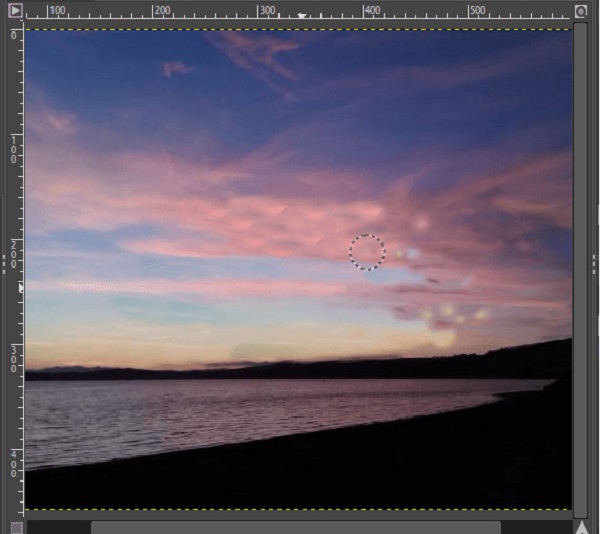
Step 3Next, select the Free Selection Tool from the toolbar located on the right side of the interface. And then, encircle/trace the watermark on your GIF. You can also use the Lasso Tool to select the watermark

Step 4After selecting the watermark area, apply the Heal Selection filter. You will see that the selected area will blend with the background. Go to Filters>Enhance>Heal Selection menu to apply the Heal Selection filter.
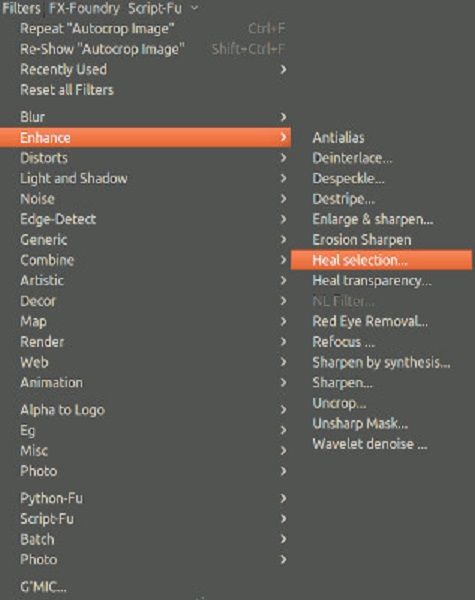
Step 5And then, a dialog box will appear where you will set out the properties. Click OK to heal the selected area, and the watermark will blend with the background. Now, you can easily add the GIF to your Google Slides, video art, etc.
Part 3. Better Method to Remove Any Watermarks from GIF
We have a suitable tool if you want an easier way to remove watermarks on GIFs without plug-ins. This part will grasp how to remove any watermarks from your GIF with the ultimate tool that you must use. Read this part comprehensively to know more details.
Tipard Video Converter Ultimate is a popular software application used for converting files. It also allows you to easily remove any type of watermark (logos, text, and images). In addition to that, it supports tons of file formats, such as MP4, MKV, MOV, AVI, FLV, WEBM, VOB, and 500+ more. You can remove not just one but two or more watermarks on your GIF. Plus, it has many advanced editing features that you can use, including adding video watermark, video enhancer, video merger, and more from the Toolbox. You can download this app on all media platforms, like Windows, Mac, and Linux.
Steps on how to remove watermarks from GIFs using Tipard Video Converter Ultimate:
Step 1Download Tipard Video Converter Ultimate by clicking the Download button below. Follow the installation process. And then, open the app.
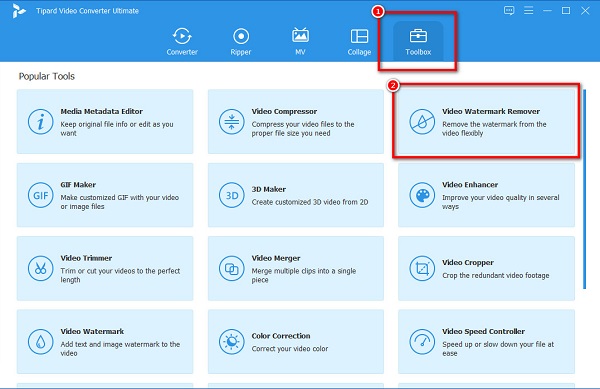
Step 2Then, go to the Toolbox panel and click the Video Watermark RemoverM.
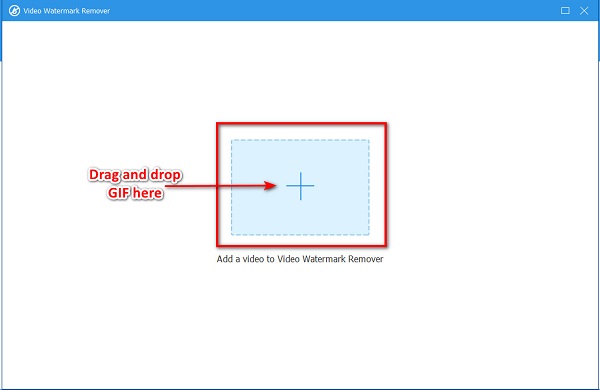
Step 3Next, click the + sign button or you can drag and drop your GIF file into the + sign box.
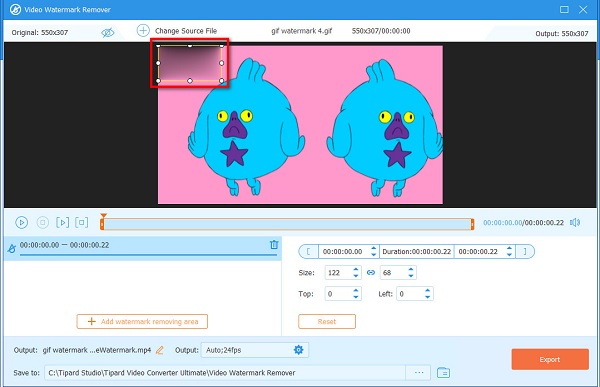
Step 4And then, tick the Add watermark removing area button. A rectangular box will appear in the preview of your output. Place it on the watermark area that you want to remove.
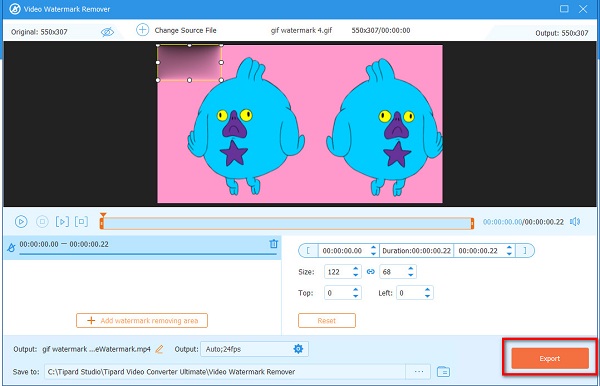
Step 5Finally, click the Export button to remove the watermark. And your output will automatically be saved on your device.
Simple, right? By following the simple guide above, you can easily remove any watermarks on your GIF.
Extended Reading:
How to Overlay Images Online, Offline, and on Premiere
4 Ways to Remove Tiktok Watermark Using the Outstanding Tools
Part 4. FAQs about Removing Watermarks from GIF
How do you remove the watermark without having a blurred mark?
You can remove watermarks from your images without having a blurred mark on the watermark area that you removed. You can use Tipard Video Converter Ultimate to remove any watermark without leaving marks.
Can Canva remove watermarks?
Yes. Canva can remove watermarks on your video. However, you need to purchase the pro element to remove watermarks. Click the Remove Watermarks button on the element to purchase it.
Do GIPHY files contain a watermark?
GIPHY videos do not usually contain any watermarks. You can also make a GIPHY video without any watermarks embedded in it.
Conclusion
You now know how to remove watermarks from GIFs. Go ahead and remove those annoying watermarks embedded in your GIF. With the help of the tools above, you can easily remove any watermarks on your GIF. But if you want to use an app with many advanced editing features, and it is free, use Tipard Video Converter Ultimate.


