How to Record Switch Gameplay with High Quality – 3 Verified Methods You Should Know
If you are a game anchor, you may want to record your Switch gameplay and share the videos with your audiences on social media websites. What are the best methods to capture the gameplay videos of Switch? How to record the videos with the best quality? Just learn more about the 3 verified methods from the article.

Part 1: The Built-in Method to Record Gameplay via Switch
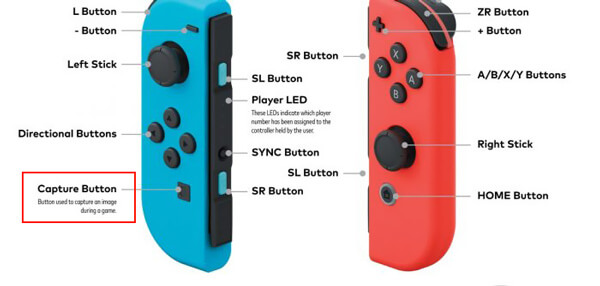
The Switch controller is the built-in feature to record Switch gameplay videos. It enables you to record the videos and take snapshots. Once you have a long-press of the Capture button, you can capture any gameplay videos on the device with the following steps.
When you are ready for recording Switch gameplay, just long-press the Capture button, and then it will record a video of 30 seconds.
If you receive a message told you that the video has been saved at the upper left, it means you have recorded Switch gameplay successfully.
After that, you can check the recorded video from the Album button. Then you can upload it to Facebook or Twitter.

However, there are many limitations to record gameplay videos for the method. It has a time limitation that you can only record Switch gameplay for 30 seconds. The Switch can only record the video before you press the Capture button, so it's difficult to find the right time to capture the desired videos. Moreover, it cannot satisfy the needs of recording all games.
Part 2: 2 Best Methods to Record Switch Gameplay with High Quality
Method 1: Professional Method to Record Switch Gameplay
Whether you need to record the Switch gameplay with 1080P, or capture the whole video for further editing, Tipard Screen Capture is an all-in-one screen recorder to capture screen videos, record microphone, and system audio, take snapshots, and get webcam footage. Moreover, you can also add annotation and shapes to the recording file.
- 1. Capture all onscreen activities for the gameplay video without limitation.
- 2. Tweak the video codec, resolution, bitrate, frame rate, and more others.
- 3. Add watermark, annotation, shapes, callouts, and drawing to the videos.
- 4. Set up the scheduled recording to capture the gameplay automatically.
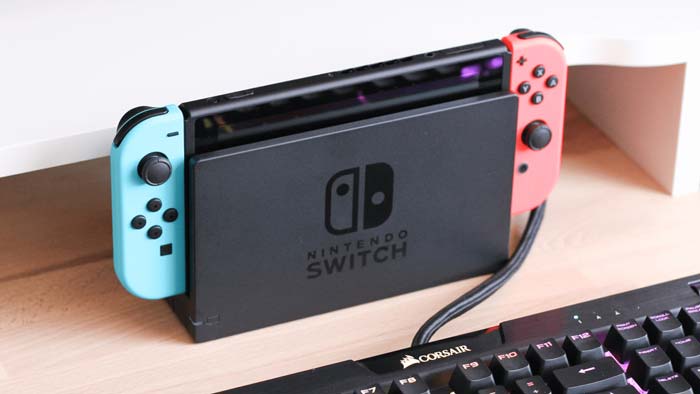
Connect Switch to your computer via Switch Dock and make sure your computer can recognize the device. Download and install Tipard Screen Capture, you can launch the program on your computer and have some tests beforehand.

Click the Video Recorder button and tweak the recording area for recording. You should enable the System Sound option to capture the audio files. To record Switch gameplay with commentary, turn on the Webcam option and the Microphone option.

Go to the Setting menu, you can choose the Output button to set the Video quality to make sure you can record Switch gameplay with high quality. When you are ready to record Switch gameplay, click the REC button to start recording. After a three-second countdown, the recording begins.

During the process of recording, you add callouts, shapes, or even drawing to the video. Moreover, you can adjust the colors and the sizes for the watermark and text. Click the red square button when you want to stop the Switch gameplay recording.

After recording, the preview window appears, you can intercept the specified duration of the Switch gameplay recording in the window. And then click the Save button when you finish editing. Finally, customize the file name select the path to save your recording file.
Also Read:
Method 2: Record Switch Gameplay with the Capture Card
If you want to record videos of any games from Switch longer than 30 seconds, a capture card is another excellent method to capture the videos with high quality. But it requires some preparation beforehand.
1. A Dock for Switch with USB and HDMI interfaces.
2. HDMI cables that can connect Switch and the capture card.
3. A proper computer that can project the screen of Switch.
Connect the capture card to Switch. Plug one end of an HDMI cable into the HDMI OUT port on Switch Dock and plug the other end into HDMI IN on the capture card. And then prepare another HDMI cable. Plug one end of this HDMI cable into HDMI OUT on the capture card and plug the other end into HDMI IN on the monitor.
Then you need to connect your Switch to the prepared Switch Dock, and connect the capture card to your computer via a USB cable. Make sure your computer can recognize Switch.
Launch the capture card software on your computer and prepare the game that you want to record gameplay.
Now you can record Switch gameplay with the capture card. If you can start the record, click the Record button on the capture card. And then you can click the Stop button when you want to stop it.

Part 3: FAQs about How to Record Switch Gameplay
Which capture card is suitable for Switch?
Choosing a suitable capture card is important for recording Switch gameplay. Here are some recommendations for your reference, Elgato HD60 S Capture Card, Elgato Game Capture HD60 Pro, AVerMedia Live Gamer Portable 2 Plus, and AverMedia Live Gamer Duo.
How to edit or trim a video clip via Switch?
The Switch has a built-in editor. Select the A button to choose edit or post when watching the clip, then select the Trim and press the A button again to save the edited part. You can only edit the parts of start and end, but cannot combine them as one video. Your Switch will also keep the original video in case if you want to delete the edited file.
Is it possible to record Switch Gameplay wireless?
Yes. You can easily pair Joy-Con controllers with a Windows or Mac computer from directly within the Bluetooth menu. But it should be difficult to record the Switch gameplay, especially when you need to record Switch gameplay videos continuously in high quality.
Conclusion
Here are the workable ways about how to record Switch gameplay, you can record it via Switch with its internal function no longer than 30 seconds, record it with a capture card, or with a professional screen recorder, such as Tipard Screen Capture to record Switch gameplay with high quality.


