Simplest Ways to Mount an ISO File on Any OS on PC [No Third-Party]
ISO mounting is a fundamental process that enables people to access the contents of a disk image without burning it to a disc. Whether dealing with software installations, operating system installations, or simply accessing files stored in ISO format, knowing how to mount an ISO file can be incredibly useful. In this article, we'll explore the step-by-step guide to effortlessly mount an ISO file on various operating systems, allowing you to access and utilize its contents seamlessly and without hassle.

Part 1. What is ISO Mounting?
ISO mounting refers to accessing the contents of an ISO image file without burning it onto a physical disc. An ISO image is a library file containing an identical copy of the data on a disc, such as a CD, DVD, or Blu-ray. This file format is commonly used to distribute software, operating systems, games, and large data sets.
Mounting an ISO file creates a virtual drive that imitates the behavior of a physical disc drive. Instead of needing a physical disc, the operating system treats the mounted ISO like a real disc inserted into a drive. It enables users to explore, extract, or execute the files contained within the ISO image without needing a physical disc, making it a convenient and practical method for accessing and utilizing the contents of the ISO file.
By mounting an ISO image, users can install software, run programs, or access files directly from the virtual drive without the limitations associated with physical discs. This method saves time and eliminates the need for physical media, contributing to a more efficient and streamlined workflow for various tasks and operations.
Part 2. How to Mount ISO on Windows
How to mount an ISO Windows 10? Mounting an ISO on Windows involves using built-in tools to create a virtual drive that emulates the presence of a physical disc. Windows provides native features for ISO mounting, simplifying the process for users to access and use ISO files without additional software.
1st Method: Windows Powershell
With Windows PowerShell, you can mount an ISO file using commands. This method, suitable for those comfortable with command-line operations, offers advanced control. By using PowerShell with administrative privileges, mounting an ISO becomes a swift and efficient process, allowing direct access to the ISO contents through commands. Learn how Powershell mount ISO works with the steps below.
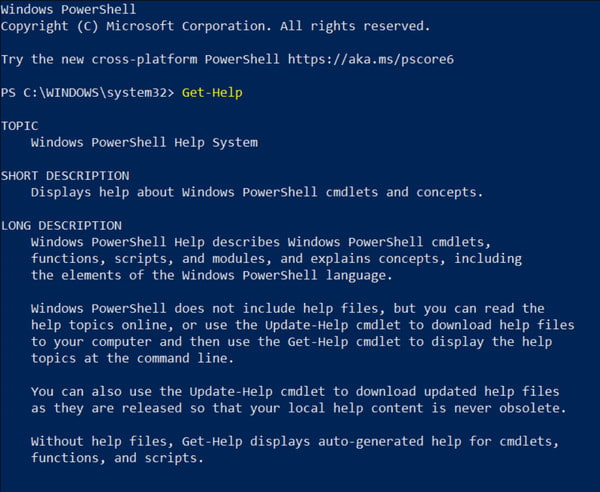
Step 1Open PowerShell with administrative privileges. To do so, search for PowerShell in the Start menu, right-click, and select Run As Administrator.
Step 2Use the Mount-DiskImage commandlet followed by the path to the ISO file. For example, Mount-DiskImage -ImagePath “C:\Path\To\Your\ISO\file.iso”.
2nd Method: File Explorer
Using File Explorer as an ISO mounter, you can smoothly mount an ISO file as a virtual drive. This simple method allows quick access to the contents of the ISO without any additional software. A few clicks create a virtual drive, making exploring the ISO's files and folders effortless.
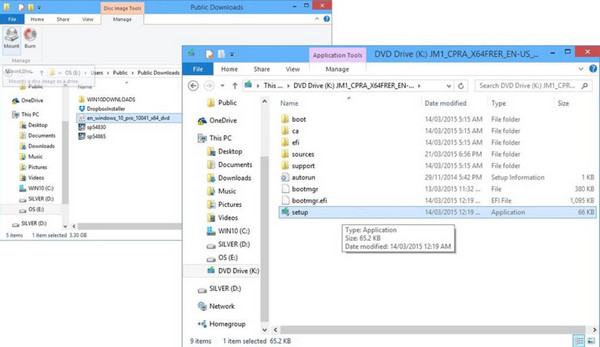
Step 1Open File Explorer or Windows Explorer.
Step 2Locate the ISO file you like to mount and right-click on the ISO file.
Step 3Select Mount from the context menu, and the ISO contents will be accessible in the newly created virtual drive.
Part 3. How to Mount ISO on Mac
On a Mac system, mounting an ISO can be achieved using the Disk Utility application or command-line tools. The process involves creating a virtual disk from the ISO file, allowing users to access its contents like inserting a physical disc into the system.
1st Method: Use Disk Utility
Disk Utility on a Mac lets you easily mount an ISO content as a virtual disk. This graphical method provides a user-friendly approach, enabling quick access to the ISO's contents without requiring additional software.
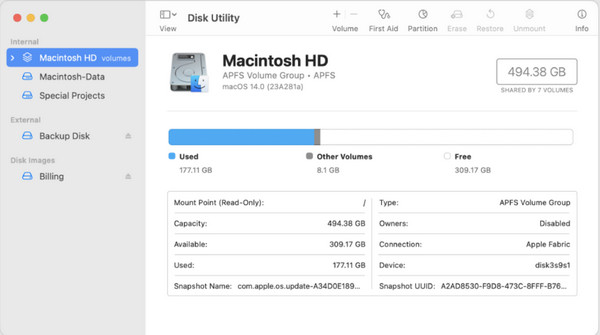
Step 1Open the Applications, select Utilities and open Disk Utility.
Step 2Click on File in the menu and pick Open Disk Image.
Step 3Locate and select the ISO file to mount and click Open to mount the ISO.
2nd Method: Use Terminal or Command Line
Mac's Terminal offers a method to mount an ISO file using the hdiutil command for users comfortable with command-line operations. While this approach requires some familiarity with the command line, it provides a direct way to mount an ISO file.
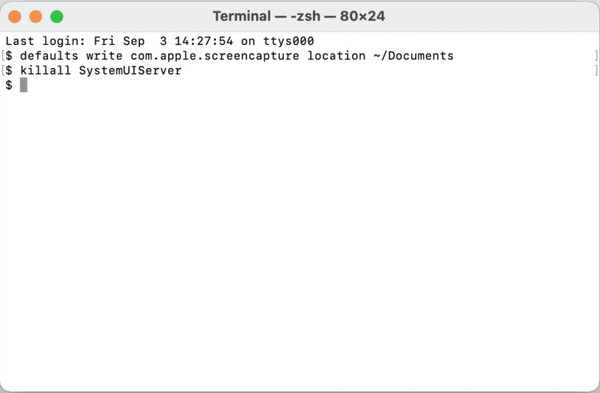
Step 1Open Terminal by going to Applications, then Utilities.
Step 2Use the hdiutil command to mount the ISO and copy the path of the ISO. For example, hdiutil mount /path/to/your/iso/file.iso.
Part 4. How to Mount ISO on Linux
How to mount an ISO on Linux? In Linux distributions, mounting an ISO involves command-line operations or utilizing the file manager's native capabilities. Linux offers flexibility by allowing users to mount ISO files directly to a directory or mount point, granting access to the contents within the file.
1st Method: Use Terminal or Command Line
The Terminal or command line interface in Linux provides a direct and powerful method to mount an ISO file. It offers precise control and flexibility, allowing users to mount ISO files efficiently through command-line operations.
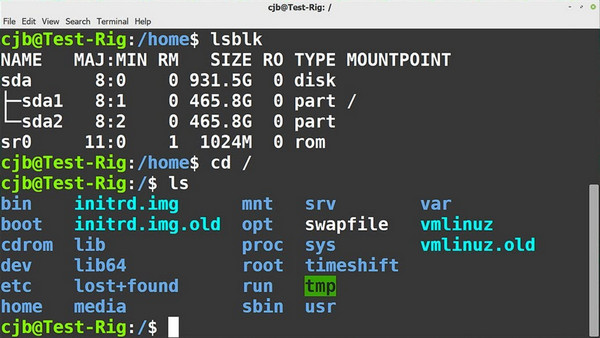
Step 1Open the Terminal on Linux.
Step 2Create a directory as a mount point: sudo mkdir /mnt/iso.
Step 3Mount the ISO file to your created directory: sudo mount -o loop /path/to/your/iso/file.iso /mnt/iso.
2nd Method Use File Manager
Linux file managers offer a graphical way to interact with files and directories. This user-friendly method provides an intuitive way to mount ISO files without command-line knowledge.
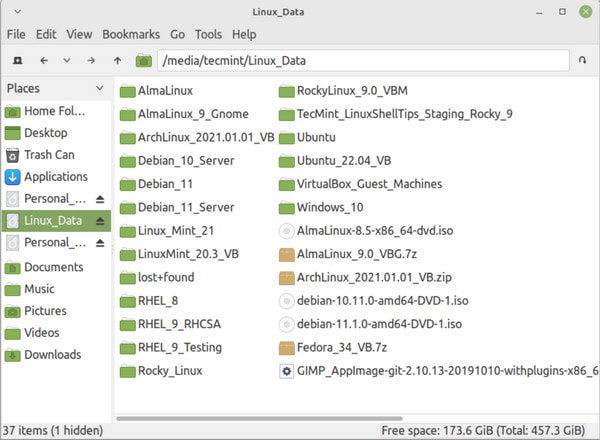
Step 1Open File Manager and go to the directory where the ISO file is located.
Step 2Right-click on the file and select Open With Other Application or Mount to access the contents.
Bonus: Best ISO Burner & Cloner You Will Need to Create a Copy or Backup
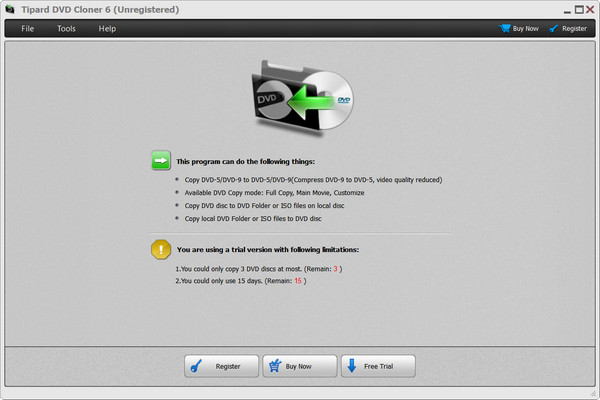
Tipard DVD Cloner is the best software renowned for its efficient DVD burning and cloning capabilities. It excels in providing versatile copying modes to suit different user preferences. With this app, you can maximize the power of its three modes of copying: Full Copy, Main Movie, and Customize mode. The Full Copy mode ensures an entire DVD's content is replicated faithfully; it lacks options for selecting titles, audio tracks, or subtitles. Alternatively, the Main Movie mode concentrates on copying the primary film without extraneous titles but offers no choice in audio track or subtitle selection. However, the standout feature lies in the Customize mode. It offers users complete control by allowing selective choices of titles, audio tracks, and subtitles, making it an ideal choice for tailored DVD copying and burning needs.
Part 5. FAQs about ISO Mount
How to mount an ISO file on Steam Deck?
To mount an ISO on your Steam Deck, open Daemon Tools, select your ISO file, and choose to mount it, creating a virtual drive recognized as a physical disc on your device.
I can't find the Mount ISO option in Windows 11; what should I do?
In Windows 11, the Mount option for ISO files might not be directly visible in the context menu. However, you can still mount ISO files by double-clicking on the file and using built-in tools like File Explorer.
Can I mount an ISO file to a USB drive?
You can mount an ISO file onto a USB drive using specific software designed for this purpose. Tools like Rufus or Win32 Disk Imager allow you to create bootable USB drives from ISO files, effectively mounting the ISO onto the USB drive for installation or data access.
Can I burn an ISO file to a physical disc after mounting it?
After mounting an ISO file and accessing its contents, you can use specific software to burn the contents to a physical disc. This process allows you to create a new disc based on the data from the mounted ISO.
Where can I play ISO files on Windows and Mac?
Windows and Mac do not natively support playing ISO files, meaning the built-in media player on said operating system can not play it. That is why you will need to look for the best ISO player on Windows and Mac to watch and open the content inside, and one of the best is the Tipard Blu-ray Player.
Conclusion
How to mount ISO Windows 11? Follow the tutorial we have added to this article, and you will be able to see what is inside the ISO file; whether you are using a Mac or Linux, that would be fine since there is a tutorial here. If you want to read more related articles on this topic, click on the articles we have made below.


