Fail-Proof Ways to Export MP4 Videos from Premiere Pro
One of the game-changing software in the video editing industry is Premiere Pro. As the world knows, this professional tool is preferred by many experts because of its advanced and impressive video editing tools. Whether you are pulling off a video advertisement, commercials, short films or even a whole movie, its comprehensive features can create a jaw-dropping masterpiece. After stitching edited clips in this software, you should consider exporting it in a format compatible with everyone's media player. In this walkthrough, here are the undefeatable tools to help you how to export Premiere Pro to MP4.

Part 1. The Best Export Settings for Premiere Pro
The first thing you need to do before starting the Premiere Pro program's editing process is to set the right parameters for your clips. As a rule of thumb, the balance between compatibility and quality is vital. As for quality, the visuals and sounds must be high resolution, which may lead to a high file size. Here is the breakdown of the parameters.
Video
Format and Codec: MP4 (H.264)
Frame Size: 1920 × 1080 or 3840 × 2160
Frame Rate: The frame should match the source video
Bitrate: VBR, 1pass
Profile: High
Audio
Format and Codec: AAC
Quality: High
Sample Rate: 48000 Hz
Bitrate: 320 kbps
Part 2. How to Export Premiere Pro to MP4
1. Tipard Video Converter Ultimate
Suppose you have videos that are already exported from Premiere Pro, yet its format needs to be converted to MP4 to ensure its compatibility when shared online or transferred to other devices. In that case, Tipard Video Converter Ultimate is a great alternative to do the job. This offline tool is known as one of the leading converters, supporting hundreds of video formats, including MP4, FLV, WAV, AVI, and so much more. On top of that, one of these tools features GPU acceleration technology, making your device conversion speed hassle-free and 60× faster. Conversely, Tipard Video Converter Ultimate has a video editor to help you enhance your projects. If you wish to learn how to export Premiere Pro to MP4 with this tool, follow the step-by-step tutorial below.
Step 1Install Tipard Video Converter Ultimate
Hit the Download button beneath to save the tool's installer. Once the file is saved, run the program and follow the installation process in the dialog box.
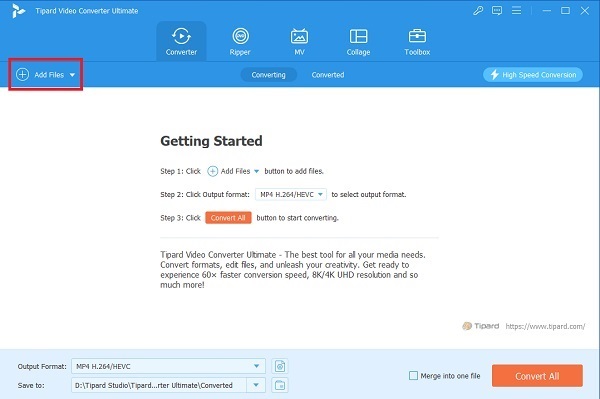
Step 2Upload Premiere Pro Videos
Afterward, go to the upper corner of the tool's interface and click Add file. Select the video from your computer and wait for it to appear on the converter. You can also upload more files simultaneously and use the program's batch conversion feature.
Step 3Choose MP4 Format
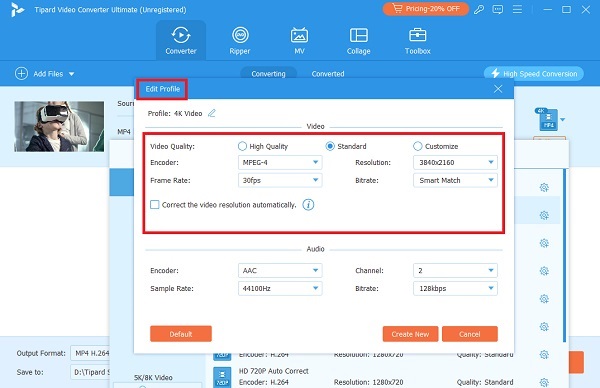
To set MP4 as your output format, expand the Output tab until you see the formats you can choose from. Move to the Video panel and scroll through until you see the MP4 file. Moreover, you can choose the different format codecs ranging from the lowest to the highest output quality.
Step 4Convert the File
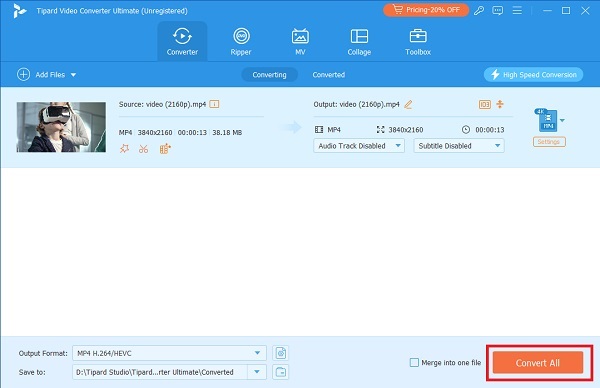
If you are satisfied with the output parameters, click the Convert button to initiate converting Premiere Pro videos to MP4. Once the conversion is done, you can open the output and play it directly from the software.
2. Any Video Converter
With over 50+ video formats like OGV, WEBM, M2TS, MOV and MP4, this Any Video Converter is able to solve any incompatibility issues you may face when playing your projects. On top of that, Any Video Converter comes with a customizable quality output that allows you to choose resolutions ranging from 480p, 720p, 1080p, and 4K. Moreover, the program can add watermarks to your creative work to avoid copyright issues and theft. Finally, this tool boasts a comprehensive toolbox that allows users to edit their videos by rotating, cropping, adding filters, special audio effects and more. Read the guide below on how to export videos from Premiere Pro with the tool.
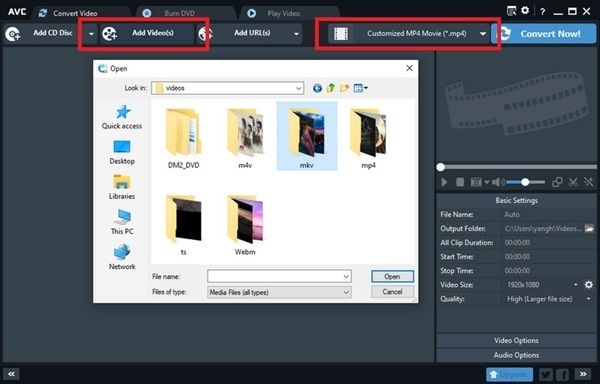
Step 1Click the Add Video(s) button on the top corner of the program and import your project from the hard drive. You may also upload your files using the URL or Add Disc.
Step 2Go to Output Profile and choose MP4 as your target format. In the dropdown list, adjust the video codec, bitrate, and channel according to your preference.
Step 3Finally, tap Convert Now! When all your preferences are set.
3. Freemake Video Converter
As the name suggests, converting Premiere Pro projects with zero cost can be done with Freemake Video Converter. This straightforward tool is available on Mac and Windows devices and is perfect for converting your Premiere files that are ready to be uploaded on YouTube. Aside from the conversion tools, Freemake is known as a Video Downloader, which lets you save free videos from different websites, including YouTube, Vimeo, Dailymotion and Twitch. In this part, here is a quick run on how to export Premiere Pro to MP4 with the program.
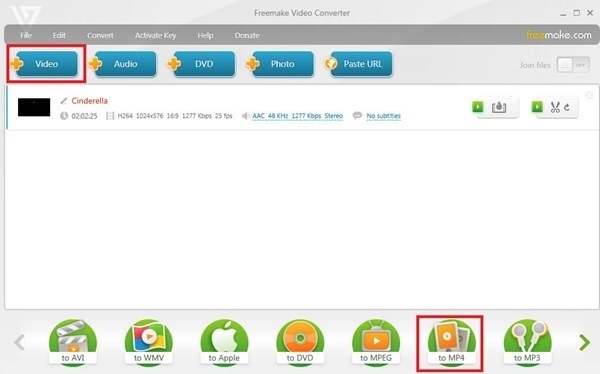
Step 1Open the tool and click the Plus button to upload your files. Alternatively, you can use the drag-and-drop function.
Step 2Expand the Output tab and select MP4 from the list.
Step 3Finally, tap Convert to the lower corner of the tool to start the process. Once the process is finished, tap the folder on the program to play your output.
Further Reading:
How to Rename Premiere Pro Projects [Steps for Various Projects]
Premiere Pro Glitchy Video Playback - What is the Causes & Solutions
Part 3. FAQs about Exporting Premiere Pro to MP4
Can you use Premiere Pro while exporting?
Absolutely yes! You can create a new project and edit video clips while exporting your previous work to Adobe Media Encoder.
How do you compress video in Premiere Pro without losing quality?
Knowing the best export settings for Premiere Pro is the primary consideration if you want to ensure a high-quality output on your projects.
Is Premiere Pro free?
No. Premiere Pro is a paid program, and users need to pay a membership fee to access its full features. The payment option is $22.99 monthly for individuals or $37.99 monthly for teams. On the other hand, unlike other creativity software, Premiere Pro does not cover free usage among students.
Which is better, DaVinci Resolve or Premiere Pro?
While these two video editing platforms compete in a head-to-head competition, Premiere Pro still has a better edge than DaVinci Resolve when it comes to rendering visual effects for your projects.
Conclusion
There, you can find ways to export videos from Premiere Pro. The software poses a great advantage to most users who want to explore the film industry because of its explicit features in video editing. On the other side, exporting options from the tool may secure compatibility, but it can also be done with third-party tools mentioned in this walkthrough.


