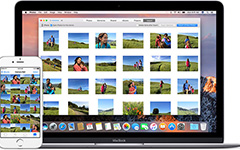
The Easiest Way to Transfer iPhone/iPad/iPod Photos to Computer on Windows
Now, iPhone has the ability to record 4K UHD videos and 1080p HD videos, which need much more space for storage. After taking a large amount of precious photos, shooting lots of 4K and 1080p HD videos, and saving many favorite pictures on iPhone, you find there is no much space to store other content files. At this time, you may urgently need to free up the space but won't to delete multiple photos, videos on iPhone. Don' t worry about it, we recommend you the professional but easiest way to solve the problem. Transfer all your favorite photos to your computer local disk for backup with the best iOS Photo Transfer software.
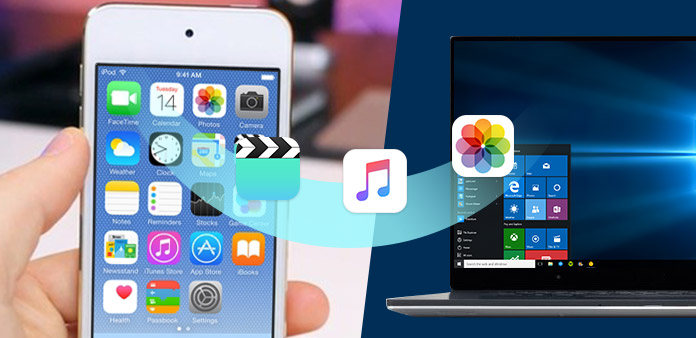
Part 1. Transfer iPhone photos to PC with Tipard iPhone Transfer software
Thirty-party software can offer a comprehensive way of transferring files from your iPhone to computer. Tipard iPhone Transfer Ultimate is powerful but easy to use File Transfer software for iOS device, which has the ability to transfer files between iPhone, iPad, iPod, and computer, and also sync to iTunes. You can easily transfer photos, contacts, SMS, music, videos, and more on your iPhone and iPad with super fast speed, and manage your data by exporting, adding, deleting, and more without iTunes. Besides, You are allowed to sync photos, music, videos and others to iTunes for backup. It is highly compatible with iOS 18 and the latest iPhone 16, iPhone 15, iPhone 14, iPhone 13, iPhone XS, iPhone XS Max, iPhone XR, and also other iPhone (iPhone 7/7 Plus/6s/6s Plus/SE/6/6 Plus/5s/5) and iPad (iPad Pro/mini 4).
Key Features:
- 1. Export iPhone/iPad/iPod photos like Camera Roll, iPhoto Library, Shot Videos, App Photos and more to computer and transfer photos between iOS devices.
- 2. Transfer Music, Videos, Movies, TV Shows, Music, Videos, Podcasts, iTunes U, Ringtones, Audio Books, and Voice Memos between iPhone/iPad/iPod and PC.
- 3. Backup contacts and messages from iPhone to computer on Windows 10/8/7.
- 4. Sync music, video and photo files from iPhone/iPad/iPod to iTunes for backup.
- 5. Fully compatible with iPhone 16/15/14/13, and the newest iOS 18.
How to transfer photos from iPhone to computer on Windows 10/8/8.1/7/Vista/XP
Download and install iPhone Transfer Ultimate
Firstly, download and install Tipard iPhone Transfer Ultimate for free. And then run the software on your computer to open the main interface.
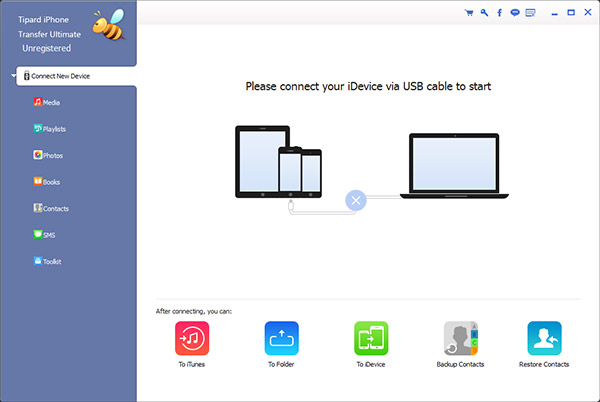
Connect your iPhone to PC to recognize iPhone data
Connect the iPhone to your computer by USB cable, the software will recognize your iPhone and automatically detect the contents in your iPhone. You will see the file types at left sidebar in the main interface including Media, Playlists, Photos, Books, Contacts, and SMS, etc.
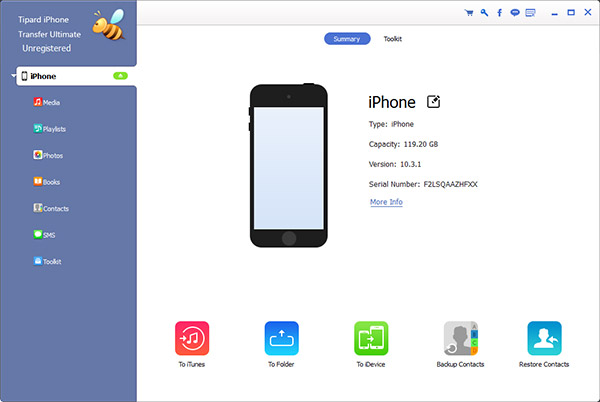
Select the photos as target files
Click Photos in the left sidebar, and the contents will be shown in the right part of the window. If your Photos Library is empty, the software will offer an "Add Item" button in the middle of the window to help you add photos from computer.
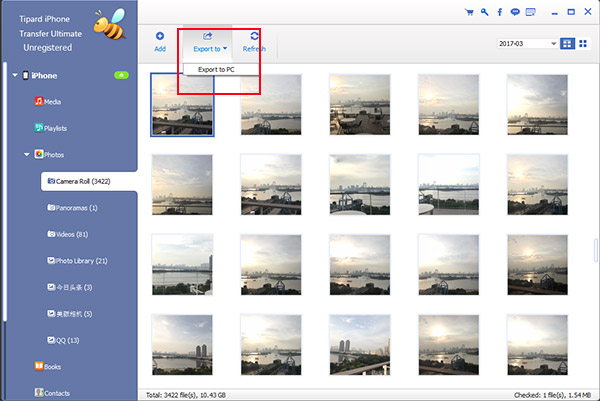
Of course, if you want to export iPhone photos to computer, you should select the photos you need to transfer, and then click "Export to > Export to PC" at the upper corner of the window. By the way, this software supports you to preview and edit the backup content before you performing.
Start to export photos to computer
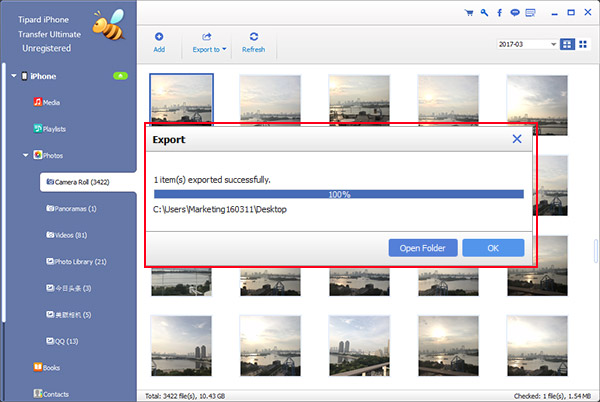
Click "Export to > Export to PC" button and select the output destination and then click OK button to start to transfer iPhone pictures to computer. This process would be finished with super fast speed.
Part 2. Transfer pictures from iPhone to computer with Windows Explorer
Windows Explorer can also help you export Camera Roll photos from iPhone to PC local disk in a easy and quick way. For exporting all iPhone photos, and keeping them organized, you should use Tipard iPhone Transfer and more to Part 1 to get it. Windows Explorer will allow you to view photos on your device and extract individual picture and video (including screenshot) from your iPhone. Here is the step-by-step guide on how to transfer pictures from iPhone to PC with Windows Explorer.
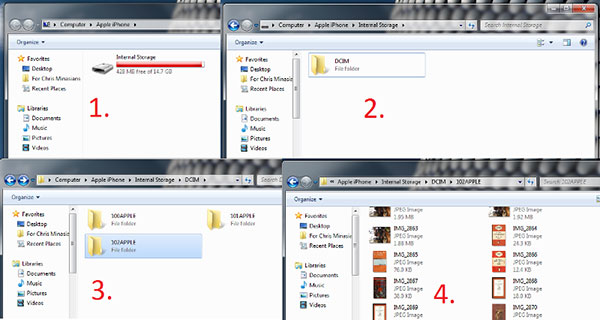
Step 1. Connect iPhone to PC with USB cable > Open My Computer > Find Portable Devices Sections and choose iPhone icon.
Step 2. Double click iPhone icon to open iPhone > You'll see the Internal Storage icon > Double click to open it.
Step 3. You'll see the DCIM folder that is the Camera Roll folder > Double click to open it > Open one folder to see if it contains the photos you want to transfer > Select the photos you need to export > Copy them to the desired folder on your computer to finish the transfer process.
Part 3. Download photos from iPhone to computer using iCloud
iCloud Photo Library automatically keeps every photo and video you take in iCloud, so you can access your library from any device, anytime you want. You should keep your device connects to Wi-Fi and your battery is charged, and then photos can upload to iCloud each time. If you haven't opened iCloud, you just choose Part 1 to continue.
Step 1. Open Chrome or other browser on your computer and head over to icloud.com. And then download and install iCloud for Windows.
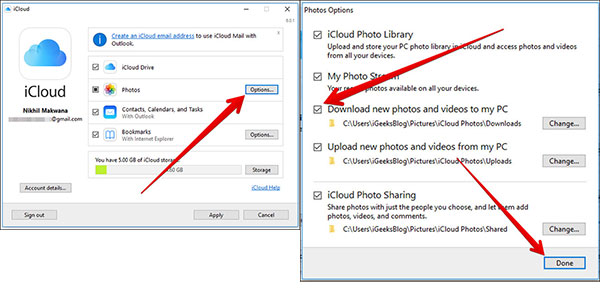
Step 2. Launch the application and Sign in to iCloud to access to the main interface. Here "Options" button next to My Photo Stream to open the Photos Options window.
Step 3. Click Download new photos and videos to my PC, and then Click Done button. Back to the main interface and then click Apply button to start to download iPhone photos to PC on Windows 10/8/1.8/7/Vista/XP.
Conclusion
From above the three methods to transfer photos from iPhone to computer, you can choose the best one for you. However, most of users will only apply to camera Roll Photos, the photos synced to a computer or backed up to iCloud, and album photos are not supported by such methods. As Tipard iPhone Transfer Ultimate supports all kinds of photos and you can freely backup any picture type to computer. You can download this software and enjoy with ease.


