How to Convert MKV to AVI Using the Most Practical Software

MKV is becoming more and more popular these years. As a video lover, you may have downloaded many .MKV files on computer. The question is how to convert .MKV files to other popular video file formats like HD video, AVI, MP4, MPEG, WMV, MOV, VOB, etc, so that we can watch them and put them on portable devices such as iPod, iPhone, Zune, PSP, Zen, iRiver, Xbox, Apple TV, etc. This Guide shows you how to convert MKV video with Tipard Video Converter Ultimate, which is an easy way to complete the MKV video conversion.
Matroska's MKV "universal" Container is described by its developers as "the extensible open standard Audio/Video Container." This translates to a multimedia Container designed to support practically any type of video or audio stream you might care to use. MKV stands for Matroska Video.
Step 1: Download and install Tipard MKV Video Converter.
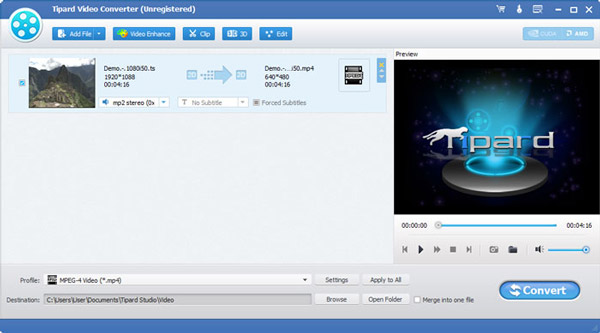
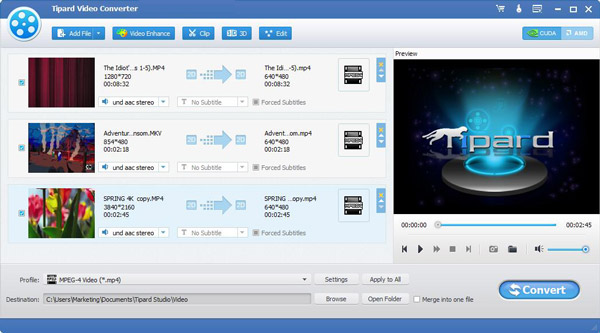
Step 2: Add file to Tipard MKV Video Converter interface. There are three ways to put your files on it.
Method One: Click "Add File", it would pop up one window, and select you want to convert file on this window.
Method Two: At the top of the drop menu, click "File", then select "Add File" to import MKV files.
Method Three: Drag the file to Tipard MKV Video Converter interface directly.
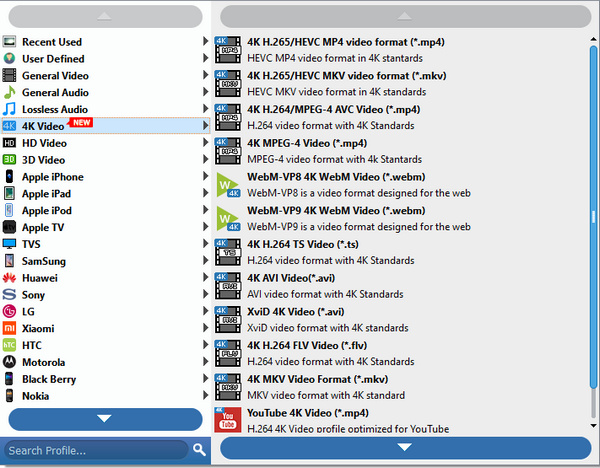
Step 3: Choose profile
Tipard MKV Video Converter can easily convert MKV files to AVI, MPG, MP4, 3GP, HD videos, etc. And extract audio from MKV and other videos to AAC, AC3, AIFF, MP2, WMA, WAV, etc. Select proper format according to your need.
Note:
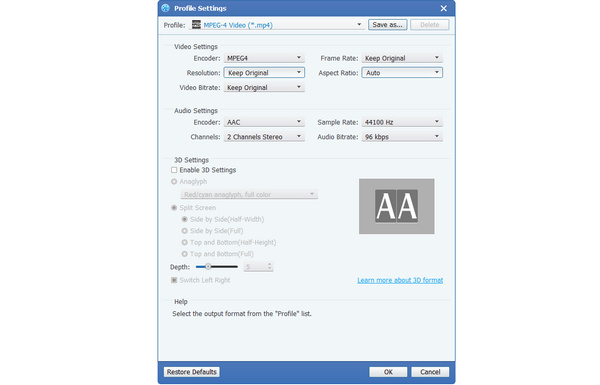
Before you start the conversion, you can define the video and audio settings.
Click the "Settings" button to open the Settings window.
In the Video Settings, you can select Encoder, Frame Rate, Resolution and Video Bitrate to convert your movie. Moreover, you can also directly input your own resolution as the form of "XXX*XXX";
In the Audio Settings, you can select Encoder, Channels, Bitrate and Sample Rate to convert your movie.
You also can save all the output settings as your preference, which is saved in the user-defined column automatically.
Tips:
Tip 1: Edit video effect
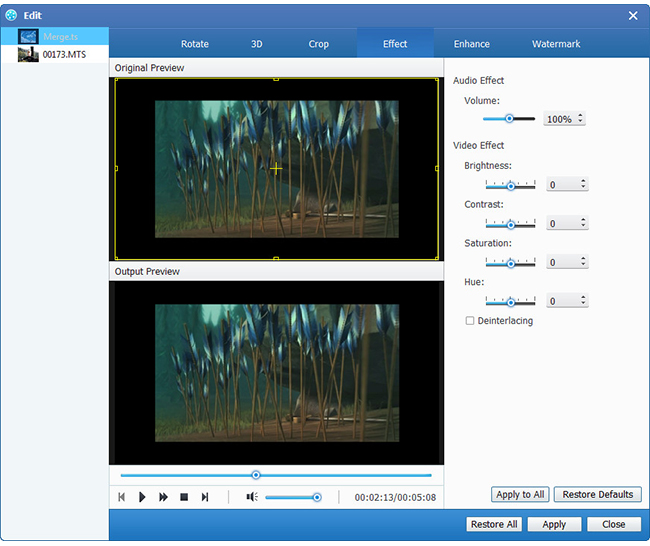
Click "Effect" button on the top of the interface to pop up the video edit effect window.
Brightness: Drag and click the Brightness adjustment bar to set the brightness of the video.
Contrast: Drag and click the Contrast adjustment bar to set the contrast of the video.
Saturation: Drag and click the Saturation adjustment bar to set the saturation of the video.
Deinterlacing: when you convert the interlaced video formats such as 720i,1080i, for you to obtain better output videos, you can set the Deinterlacing function to avoid the mosaic.
Tip 2: Trim video
Click "Trim" button on the top of the interface to pop up the video edit trim window.
Tipard QuickTime Video Converter provides you three methods to trim your video length.
Method 1: Enter the start time in the Start Time box and click OK, then enter the end time in the Set End Time box and click OK.
Method 2: Drag the scissors bars under the preview window when you want to trim, then the time will be shown in the Start Time box and End Time box for your reference.
Method 3: Click "Trim From" button when you want to begin your trimming. Click "Trim To" button where you want to stop your trimming.
After you set trim time, the length of the captured clip will be shown in the Select Length box for your reference.
Tip 3: Crop video
Click "Crop" button on the top of the interface to pop up the video edit crop window.
Tipard QuickTime Video Converter allows you to remove the black edges around your movie video and customize the size of video play region.
There are three methods available to crop your video:
Method 1: Crop by selecting a crop mode
Method 2: Crop by adjusting the crop frame
Method 3: Crop by setting the crop values
There are four crop values on the lower right part of the crop window: Top, Bottom, Left and Right. You can set each value to crop your movie video, and the crop frame will move accordingly.
You can also set the output aspect ratio from the Zoom Mode according to your need. There are four choices available: Keep Original, Full Screen, 16:9 and 4:3.
Tip 4: Snapshot:
Click "Snapshot" button on the right bottom of the preview video window and the current picture in the Preview window will be captured and saved.
Click "Folder" button to open the folder where the captured images are saved. As default the captured image will be saved at users' My Documents\Tipard Studio\Snapshot.
Click "Preference" menu, you can reset the snapshot folder and the type of your captured image: JPEG, GIF or BMP formats.
Tip 5: Preferences
Click "Preferences" menu to adjust the settings related to conversion
It includes the output folder, snapshot folder, image type, conversion done, CPU usage.
Step 4: Convert
After all the steps above are done, click the right button on the interface to start to convert MKV video.


