How to Make a DVD Effectively
There are many reasons to make a DVD. Creating a DVD movie, for example, allows you to play high definition movie on HD TV and get better audiovisual experiences. Although more and more people adopt cloud service, making a DVD is still a safer way to store sensitive data. Moreover, a bootable DVD is useful to re-install, recover and back up operating system. While creating a DVD is an important skill, many people still do not grasp it. Therefore, we will share several best ways to make a DVD for different uses in this tutorial. You can learn the basic knowledge related to create a DVD by your own.
Part 1. Choose the right DVD disc
There are different disc formats available on market. You need to buy the correct DVDs according to your hardware, software and purpose before making a DVD.
DVD-R: it is usually supported by most normal DVD players. The data and movies written on DVD-R can be read many times, but is not erasable. The storage capacity of single layer DVD-R is 4.7 GB; however, you can usually burn 4.38 GB data on the disc.- • DVD-RW: this format discs can be rewritten multiple times and the data on the disc is erasable. The storage capacity is the same with DVD-R.
- • DVD+R: it is supported by most DVD players; but you'd better read the manual book of your DVD player to confirm DVD+R disc is supportable.
- • DVD+RW: generally speaking, DVD+RW disc is rewritable. But some DVD+R discs also have DVD+RW logo. So you'd better ask the seller whether the disc is rewritable.
Before shopping, you can read the cover of the discs and learn the format and other information.
Part 2. Make a DVD Disc with the Best DVD Creator
Unlike other discs, making a DVD movie has more requirements. Image quality, for example, is the biggest challenge. Moreover, a movie is usually stored in a larger file, so it may spends longer time to create a DVD movie. From these points, we recommend Tipard DVD Creator. Firstly, this DVD burning application is able to make a DVD movie with original quality as quickly as possible. And it is very easy to use.
How to make a perfect DVD movie
Download and install DVD Creator on your computer and insert a blank disc has enough storage into your optical drive.
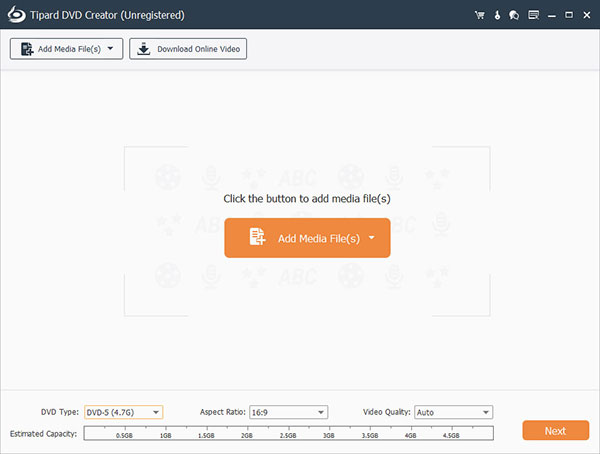
Run DVD Creator, go to Add Media File menu and select Add Video to import the movies into this DVD maker. Or you can drag and drop the movie files into DVD Creator directly.
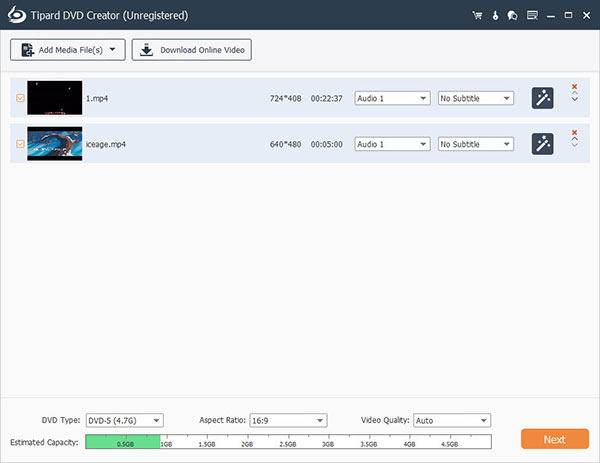
After the movies loaded, press the Edit Video menu to go to video editing screen and edit the movies as you wish. You can also hit the Edit Audio and Edit Subtitle menu to add audio tracks and subtitles on the movies. If you do not want to edit the movies, skip to step 4 directly.
Click on the Edit icon in the right DVD menu penal to open menu editing screen. It's time to use the DVD menu creator feature. Then choose a menu template and customize your DVD menu with menu elements and personal image. When the DVD menu is done, click on the Save button to save it for making a DVD.
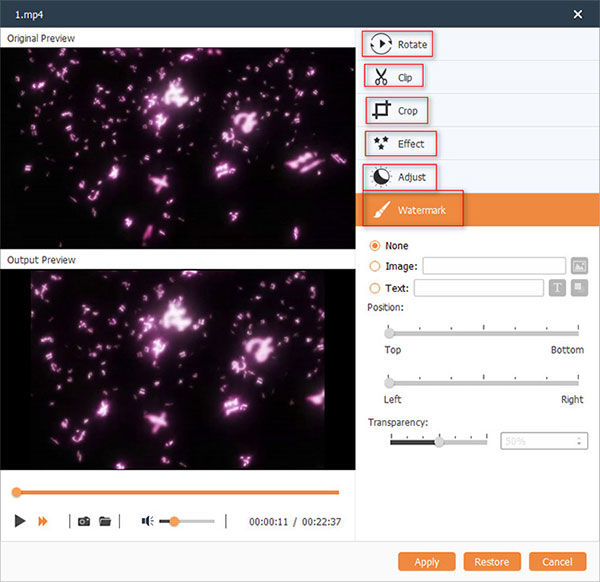
Choose the DVD drive as the Destination and pick a name in the Volume Label field. Finally, click on the Burn button at bottom right corner to start making a DVD movie.
After a few minutes, you can view the high quality DVD movie on your TV. Of course, in order to make it perfect, you can also add a DVD cover or menu instead.
Part 3. Make a data DVD with Microsoft DVD Making
Besides movies, videos and audios, discs can be a secure storage of data as well. Microsoft has integrated DVD making feature into Windows 7 and later versions.
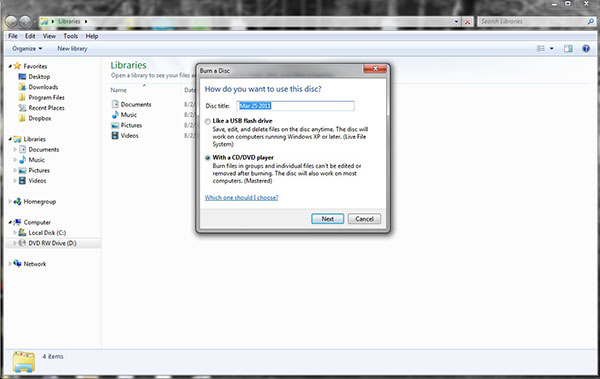
Insert a blank disc into the computer's disc drive.
When the AutoPlay dialog pops up, choose Burn files to disc option. If the dialog does not show up, you can go to This Computer, right-click on the DVD drive and select Open to evoke AutoPlay.
On the make a DVD window, pick a name for the disc, select Like a USB flash drive and click on the Next button to continue.
Drag and drop the files you want to store on the data DVD into the blank DVD folder. Or you can right-click on the files, choose Send to and then select the DVD drive.
There are two format methods you can choose to make a DVD: Live File System and Mastered. The former one allows you to edit files on the disc, but spends longer time to format. With latter one, you cannot change the documents on the disc. If you choose the Live File System format, you should click theClose session button after copy files to the disc. Otherwise, you can hit the Burn to disc button on the top ribbon to format by Mastered.
Part 4. Create a data DVD with Mac DVD Making
Apple has embedded DVD making feature into Disk Utility and Finder app in the latest Mac OS X. Actually, the workflow to make a data DVD with Finder is similar with Disk Utility. We use Finder as the example here.
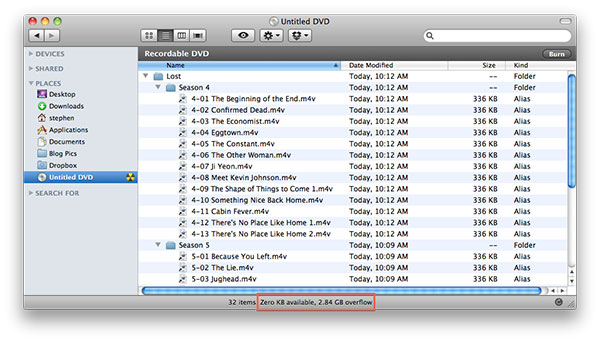
Create a new folder and put all the files you want to store on disc into the new folder.
Insert a DVD disc into your optical drive. When the pop-up screen appears, choose Open Finder option in Action box to open the Finder app for making a DVD.
On the Finder screen, locate to left side and find out the entry called Untitled DVD. Then drag and drop the new folder created in step 1 into the Untitled DVD. The status line on the bottom will show you how much space is left.
When the copy process is done, unfold the gear icon on top ribbon and choose Burn option. On the confirmation window, pick a name for the data DVD and click on the Burn button to start creating a data DVD on Mac computer.
Conclusion
In this tutorial, we introduced the best ways to make a DVD disc for different targets. If you just want to store some documents from your computer to a disc or make a data DVD, you can trust the built-in DVD making feature in both Windows and Mac OS X. It is the simplest way to make a data DVD. When it comes to make DVD, you'd better use a more powerful DVD maker, such as Tipard DVD Creator. This utility is able to make a DVD movie without quality loss. And DVD Creator utilize advanced algorithm to accelerate DVD making speed through explore hardware potential.


