
Burning WMV files to a DVD lets you enjoy your videos on any DVD player or share them with others in a more accessible format. WMV files, often used for their small size and decent quality, are ideal for creating DVDs when burned properly. We will help you make it easy to burn WMV to a DVD without any hassle!
Part 1. DVD5 vs DVD9 - Their Differences
DVD5 and DVD9 have several differences, which are described below to assist you in making the right decision in choosing the right disc. Below is a comparison table showing the difference between DVD5 and DVD9:
DVD5 can hold up to 4.7 gigabytes of data, while DVD9 has a larger capacity of 8.5 gigabytes. That is the only major difference between the two. DVD9 can hold better-quality videos and accommodate up to 240 minutes of content.
DVD9 can hold more because it has two layers, while DVD5 only has one. A dual-layer disc is almost twice the capacity of a single-layer disc, which is why DVD9 has more capacity.
It is possible to burn videos on DVD5 and DVD9 discs. However, DVD5 discs (DVD+/-RW) are rewritable, while DVD9 discs are not rewritable discs; they cannot be rewritten. It cannot be altered once data is burned on a blank DVD9 disc.
Part 2. Do You Need to Choose DVD5 or DVD9
The decision of which to go for, DVD5 or DVD9, is determined by the capacity needed and the type of data to be stored. DVD5, which has a storage capacity of 4.7 gigabytes, is suitable for small files, low-quality videos or short movies. It is also ideal if you require a disc that can be rewritten for updating or reusing.
On the other hand, DVD9 offers 8.5 gigabytes of storage, making it perfect for longer videos, high-quality content, or large files. If you need more space and do not mind that it is not rewritable, DVD9 is the better option.
Think about the size and quality of your content before choosing. If cost is a concern, DVD5 is more affordable, but DVD9 provides double the storage for larger projects.
Part 3. How to Create a DVD5 or DVD9
Creating a DVD5 or DVD9 is simple with Tipard DVD Creator, a powerful tool that supports many video formats, including MP4, MOV, AVI, and WMV. It lets you burn your videos to a DVD, create a folder, or make an ISO file. It offers features to make personalized DVDs. You can customize menu templates with frames, buttons, and text, add background music or use your favorite image as the menu design. It also lets you preview your DVD before burning, ensuring everything is right.
- Create DVDs and Blu-rays easily.
- Supports multiple video formats.
- Trim, crop, and edit videos effortlessly.
- Customize menus with text and images.

Step 1 Start by downloading Tipard DVD Creator from the official website. Next, please install the program, open it, and select DVD as the disc type you want to create.
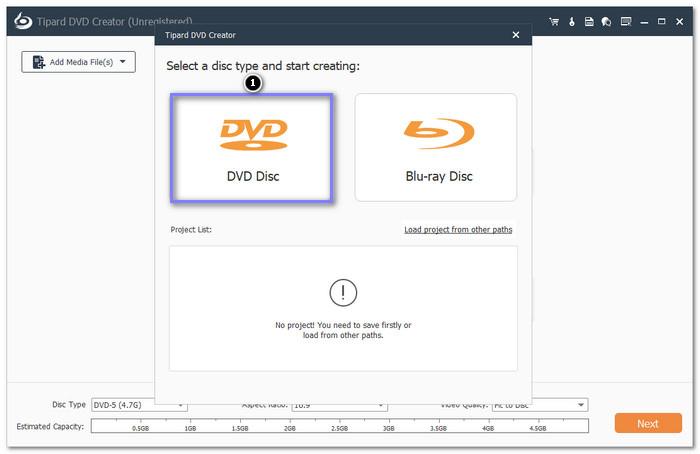
Step 2 Click the Add Media File(s) button to import the files you desire to burn to the DVD. You can add individual files, multiple files, or an entire content folder.

Step 3 After loading your files, click the Disc Type drop-down menu and select DVD-5 (4.7G) or DVD-9 (8.5G). DVD5 is best for smaller, standard-quality videos, while DVD9 can handle larger, high-quality files. When selected, click the Next button to continue.

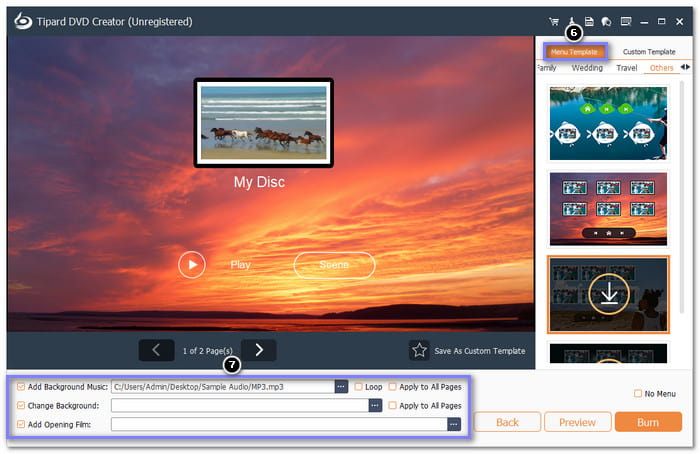
Step 4 In the next window, you can customize your DVD. You can choose a menu template, set background music, replace the background image or add an opening film. These options help make your DVD unique.
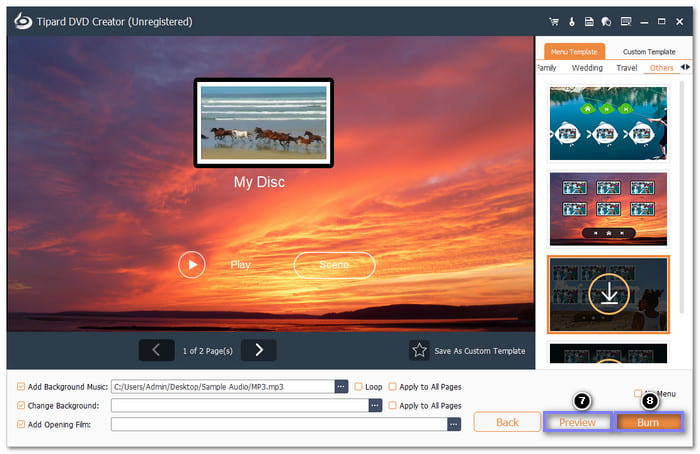
Step 5 Before burning, you can preview your DVD to ensure everything looks right. Use the Preview feature to check your files and make quick edits if necessary.
When everything is set, click the Burn button. Tipard DVD Creator will encode and burn your files to the DVD. Wait for the process to finish, and your DVD will be ready to use.
Part 4. How to Compress DVD9 to DVD5 or Inversely
Whether you want to reduce the size of a DVD-9 to fit onto a DVD-5 or expand a DVD-5 onto a larger DVD-9, Tipard DVD Cloner handles both tasks without losing quality. It allows you to compress DVD-9 to DVD-5 or vice versa easily.
Tipard DVD Cloner offers three copy modes: Full Copy, Main Movie, and Customize Copy, giving you full control over which content to include. To enhance the flexibility, you can also copy DVDs to DVD folders or ISO image files. With its simple interface and fast copying process, Tipard DVD Cloner compresses or expands your DVDs quickly and straightforwardly.
- Choose from 3 DVD copy modes.
- Clone DVDs to disc, folder or ISO.
- Select copy numbers and writing speed.
- Compatible with DVD-R, DVD+R, and ISO files.

Step 1 Begin by downloading Tipard DVD Cloner from the official website. Install it on your computer, then open the program.
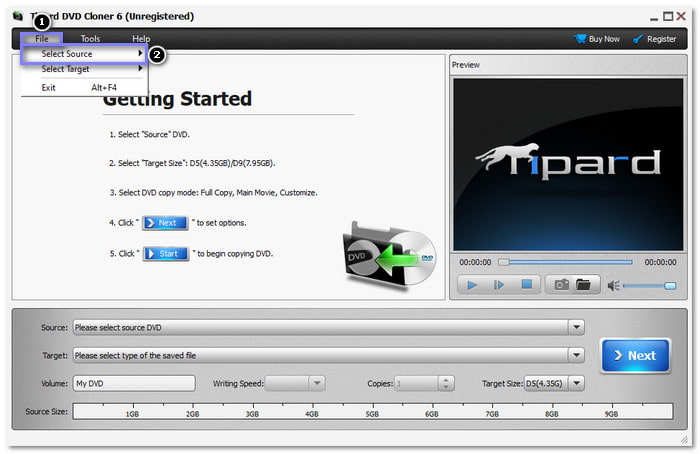
Step 2 Insert the DVD9 or DVD5 disc into your DVD drive. Head to the File menu, choose Select Source, then import the source DVD.
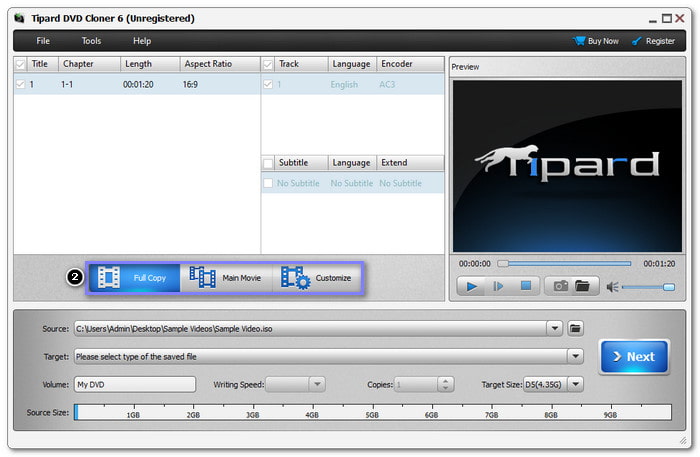
Step 3 Choose the copy mode based on your needs: Full Copy, Main Movie, or Custom. It lets you decide how much content to include in the compressed version.
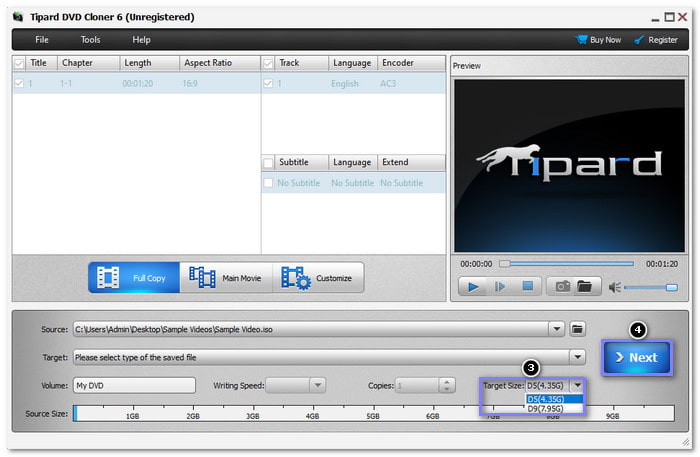
Step 4 Now, select the Target Size. To compress a DVD9 to DVD5, pick D5(4.35G) from the drop-down menu. If you upgrade a DVD5 to DVD9, choose D9(7.95G). After that, click the Next button to proceed.
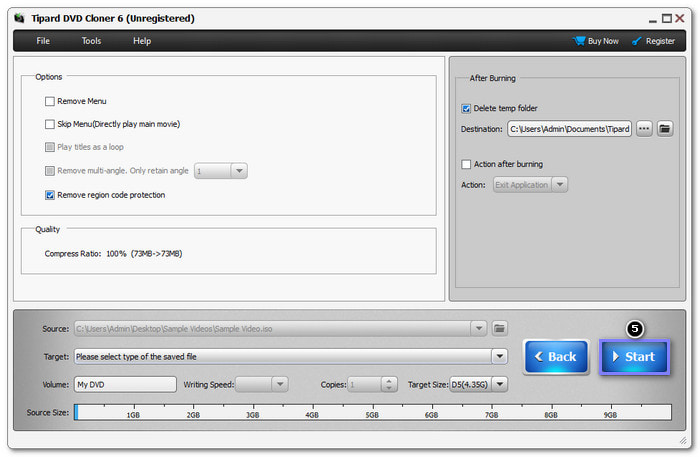
Step 5 Hit the Start button to begin. Tipard DVD Cloner will copy and compress the data. Once done, you can burn the file to a blank disc or save it as an ISO.
Conclusion
So, what is the difference between DVD5 and DVD9? You already know the answer, as you have learned from the details above. If you need help creating or compressing DVDs, Tipard has you covered.
Tipard DVD Creator allows you to create DVD or Blu-ray discs in various formats, while Tipard DVD Cloner helps you clone, copy, and back up DVDs with ease, even allowing you to compress DVD0 to DVD5 or vice versa. Whether you are working with DVD5 or DVD9, Tipard makes it simple to manage your DVDs just the way you want.
More Reading
-
 Blu-ray vs DVD - Is a Blu-ray Disc Better Than DVD
by Lily Stark on 2024-02-07
-
 Blu-ray vs. DVD vs. CD: Learn Differences of the Discs
by Lily Stark on 2023-04-23
-
 LasedDisc vs DVD: Facts, Recommendation, and Comparison
by Lily Stark on 2024-08-12
-
 How to Play NTSC DVD in 3 Best Ways (100% Working)
by Lily Stark on 2024-08-05