FLAC files offer high-quality sound, but iTunes does not support them. Now, you might wonder how you can play these files on iTunes. We have an answer for that! The best way is to convert FLAC to iTunes-supported formats! By the end, you can enjoy your music on iTunes without any trouble!
Part 1: Does iTunes Support FLAC
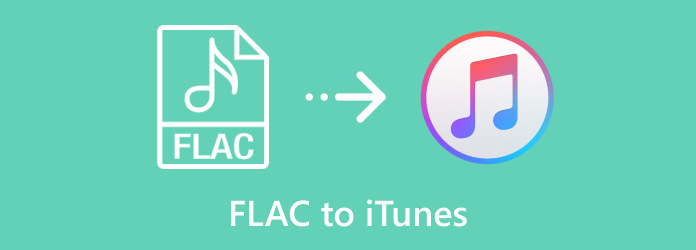
iTunes does not support FLAC files directly. You can choose a FLAC file, but it cannot add FLAC files to the iTunes library. iTunes only supports formats like MP3, ALAC, and M4A. To use FLAC files in iTunes, you must first convert them to a compatible format.
Part 2: 4 Ways to Convert FLAC to iTunes Recognizable Formats
As stated above, FLAC files cannot be added to the iTunes library. You must convert these FLAC files to iTunes-recognizable formats like MP3 or M4A to make them work with iTunes. There are a few simple ways to do this, and each method ensures your files will be compatible with iTunes.
1. Tipard Video Converter Ultimate
One powerful video and audio converter on Windows and Mac that supports iTunes-recognizable formats, like MP3, M4A, and ALAC, is Tipard Video Converter Ultimate. In the audio section, it provides a dedicated iTunes-friendly format option where you can easily choose between MP3, M4A, or ALAC. This feature makes it simple to select the right format, ensuring your choice is always compatible with iTunes and makes converting FLAC to iTunes easy.
Tipard Video Converter Ultimate stands out for its ability to process files at high speeds, offering up to 120x faster conversions. It handles batch processing so that you can convert many files simultaneously. You can also tweak audio settings like bitrate and sample rate, giving you control over the output.
Step 1First, download Tipard Video Converter Ultimate from its official website. Then, please install the program on your computer and launch it.
Step 2Hit the Add Files button on the main interface. It will open your local folder, so select the FLAC files you want to convert.
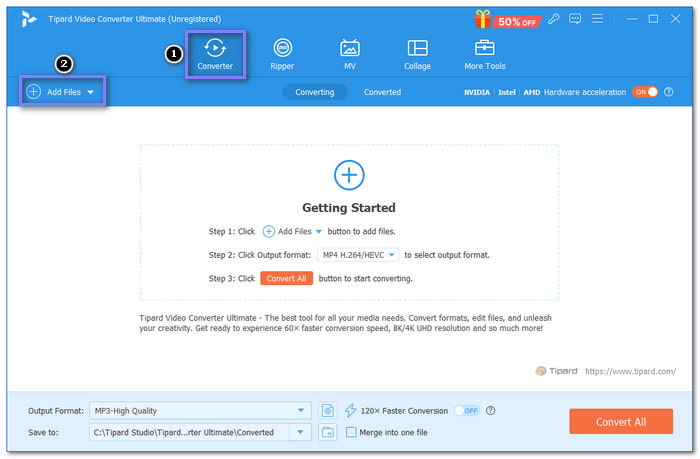
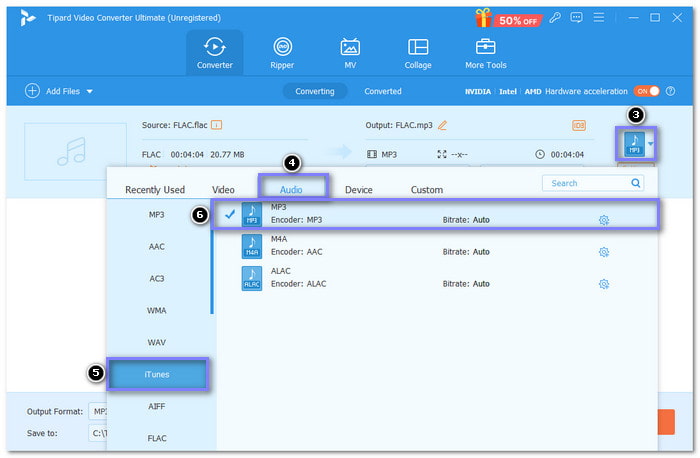
Step 3To select iTunes-recognizable formats, click the Format drop-down menu on the right side of your imported files. Go to the Audio section, look for iTunes from the list, and select formats like MP3, M4A, or ALAC.
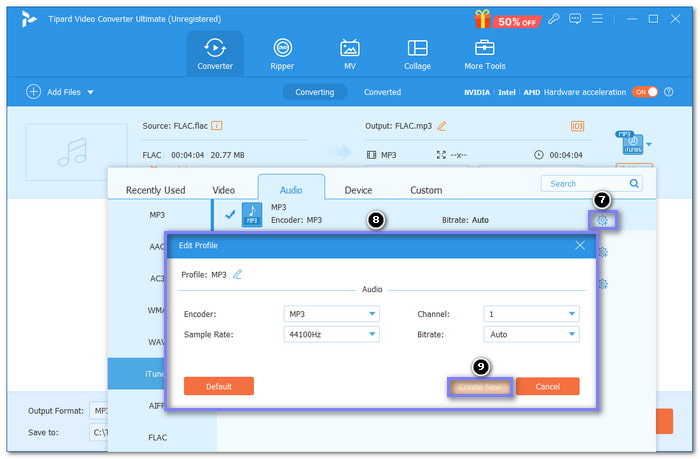
Step 4If you want to change your audio settings, click the Custom Profile button. You can change the Encoder, Sample Rate, Channel, and Bitrate here. Once done, click the Create New button.
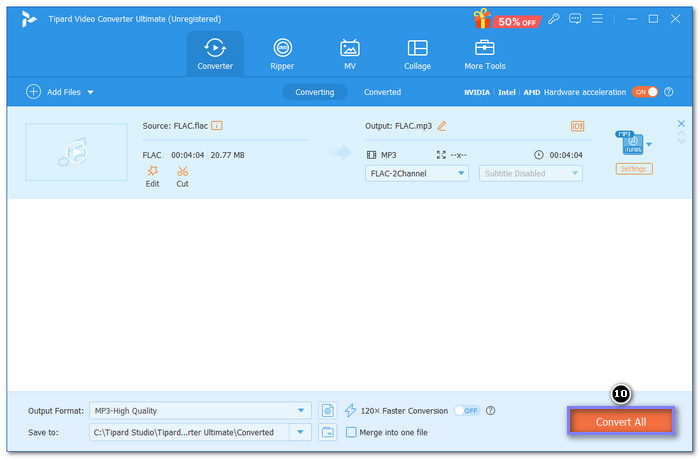
Step 5To get your converted output, click the Convert All button to begin the FLAC to your chosen iTunes-supported format conversion process.
- Batch conversion process for multiple files at once
- Customizable audio settings and fine-tuning for improved sound clarity
- High-speed conversion technology with accelerated processing times
- The free version is limited; a purchase is needed to access the full version
2. Freemake Audio Converter
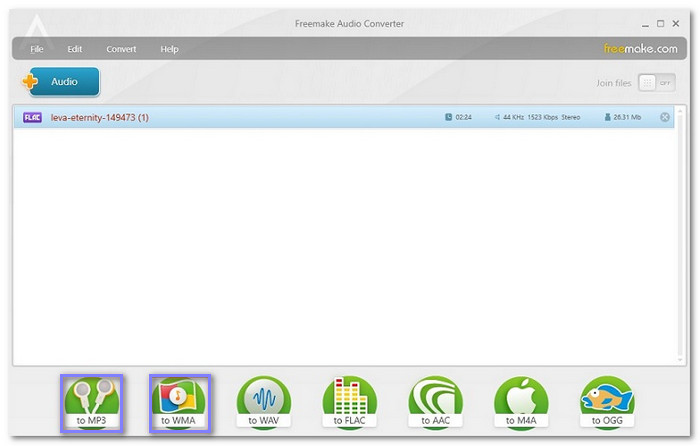
Available only on Windows computers, Freemake Audio Converter is a simple program for converting audio files. Speaking of converting audio files, it can convert FLAC files to iTunes-supported formats, like MP3, WAV, and M4A. In addition, it enables you to control settings, such as audio clarity, bitrate and codec, to ensure the output matches your needs.
Step 1Open Freemake Audio Converter.
Step 2Click the + Audio button to add your FLAC file to the program.
Step 3Select the format you need, like MP3 or WAV, by clicking the MP3 or WAV button. You can also fine-tune the settings, such as audio clarity, bitrate, and codec, to match your preferences.
Step 4Click the Convert to begin converting the file. Wait for the process to finish; you will get your converted output in minutes.
- Batch conversion
- Clean user-interface
- Watermark for free version
- Limited advanced features
3. XLD
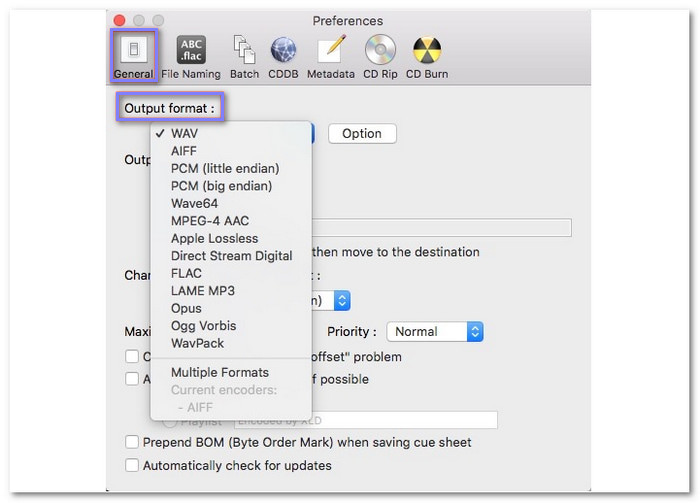
XLD, or X Lossless Decoder, is a free and lightweight program on Mac designed to convert FLAC files into iTunes-recognizable formats like WAV, AIFF, and Apple Lossless since you cannot add FLAC to the iTunes library. It is perfect for creating high-quality audio files from various sources and conveniently supports bulk file processing. Although simple, XLD focuses on reliable conversions without adding advanced editing features.
Step 1Launch XLD (X Lossless Decoder) on your Mac computer.
Step 2Head to Preferences, select the Output format option and choose a format compatible with iTunes, such as MP3 or WAV.
Step 3Go to the File menu again and select the Open option. A display will appear where you can select your FLAC file. After that, click the Open button to upload your selected files to the program.
Step 4Once uploaded, the conversion will begin automatically. A small progress window will show you the status until the process is complete.
- CD support
- Simple and free
- Batch conversion
- No updates
- Limited features
- No graphical interface
4. CloudConvert
An online-based converter, CloudConvert, helps you convert FLAC files into iTunes-recognized formats, such as MP3, M4A, and WAV. It supports over 200 file types and provides customization options for audio clarity, bitrate, and sample rate. You can even trim your audio files or fine-tune the volume. CloudConvert ensures your files stay secure and private while delivering high-quality conversions without installing programs.
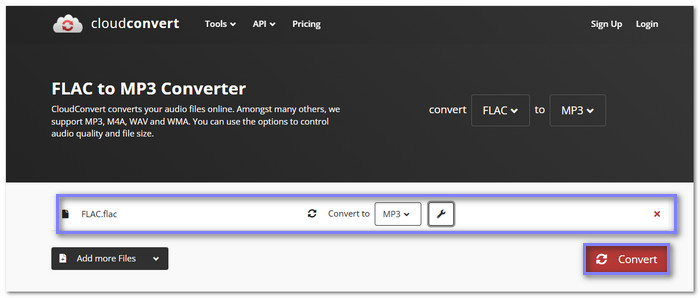
Step 1Go to CloudConvert's FLAC to MP3 Converter using your web browser.
Step 2Hit the + Select File button to add your FLAC files.
Step 3The Convert to option is set to MP3, so there is no need to change it here. If you want to fine-tune audio settings, click the Wrench button.
Step 4For the final step, press the Convert button to get your converted output.
- Wide format support
- No installation required
- Customizable settings
- Internet dependency
- File size limits
- Limited free conversion
Part 3: How to Add Files to iTunes Library
Importing files to your iTunes library is easy and allows you to listen to your music, and view videos and other media on your computer or Apple devices. You can easily import individual files or entire folders into your library. This way, your favorite content is just a few clicks away. Here's how to do it:
Step 1Open the iTunes on your computer.
Step 2Click on File, then select Add File to Library or Add Folder to Library.
Step 3Find the file or folder you want to add, and click Open.
Step 4If you choose a folder, all the files inside will be added to your library.
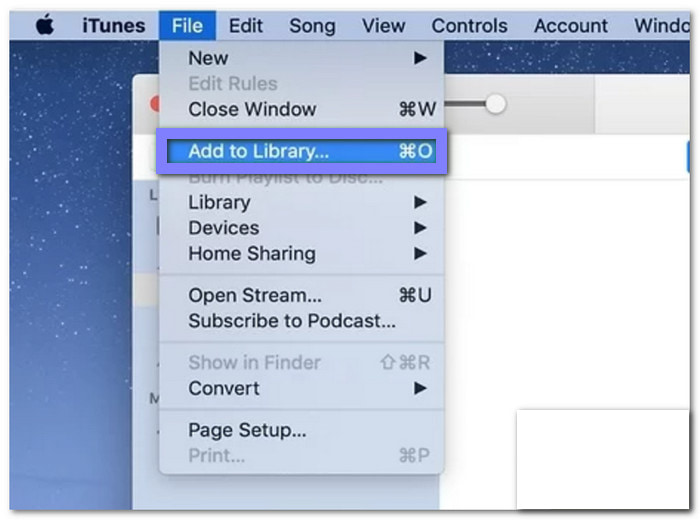
When you add an item by dragging it or using Add File to Library, iTunes refers to the file in its folder, not the actual file. If you move the reference, you may be unable to play the song.
Conclusion
Can FLAC be added to the iTunes library? As the article answered, unfortunately, no. But no need to worry! We have provided ways to convert your FLAC files to iTunes-supported formats like MP3 or M4A. One of the best tools to do this is Tipard Video Converter Ultimate. It is easy to use, fast, and reliable for converting files. With this tool, you can quickly enjoy your music on iTunes without any hassle. Happy listening!


