Top Methods of Video Color Correction for Better Display
In digital media, colors are essential to express emotions, define the mood, and even ensure continuity in transition across platforms. However, no matter how advanced the cameras are and how much care the creators take, the result is not always as expected - the lighting, the camera's settings or even the situation may differ. This is where color correction is needed. Luckily, there are numerous applications that you can use to modify your color.
To help you get through these procedures, this article will present and recommend tools and software to achieve this. Now, let's look at the best-recommended software for color correction with the step-by-step guide below.

Part 1: What is Video Color Correct?
Color correcting is a post-production process that helps modify the colors of the video. It corrects changes in lighting situations and adds beauty to the final output. It is about fundamental parameters, including exposure, white balance, contrast, and saturation. These are essential in creating a consistent appearance of the video footage.
Moreover, color correction is not only the process of correcting mistakes or incoherent color pictures but also an artistic process. Therefore, video color correction entails crucial post-production processes that improve video quality by standardizing, correcting, and even allowing creative freedom with color.
Part 2: The Easiest Video Color Correction Method
If you need a simple solution to give your videos a better color and overall quality, then Tipard Video Converter Ultimate is the best fit. This dedicated software gives users a straightforward method for enhancing video aesthetics. It offers a simple solution to change the video effects, including brightness, saturation, hue and contrast, with an easy process. It helps to filter out the background sounds and reduce the camera shake on your dear videos from the past, which are as straightforward as possible. Furthermore, it gives a user-friendly interface on how to upscale your videos from standard to high definition or enhance 1080p movies to 4K Ultra High Definition. It guarantees that your videos are not only viewed but visualized.
Step 1Install Tipard Video Converter Ultimate on your available computer system. To download the program quickly, click on the Download button indicated below. After the download is complete, install this application and then launch it.
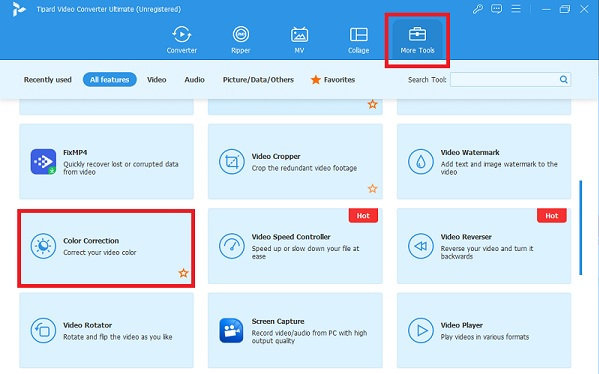
Step 2Once the software is launched, go to the Toolbox from the interface. In this section, select the Color Correction option.
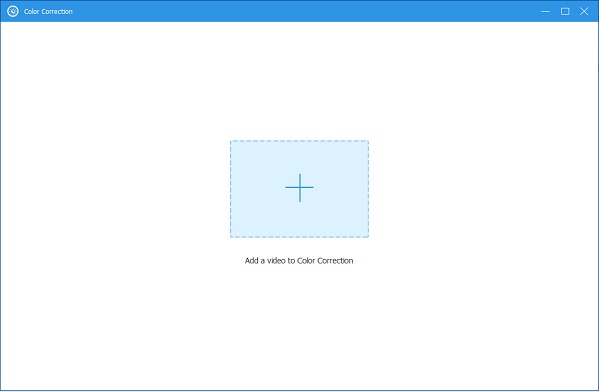
Step 3In the new interface, click the Plus button to select the video you wish to color correct. This prepares your video for optimization.
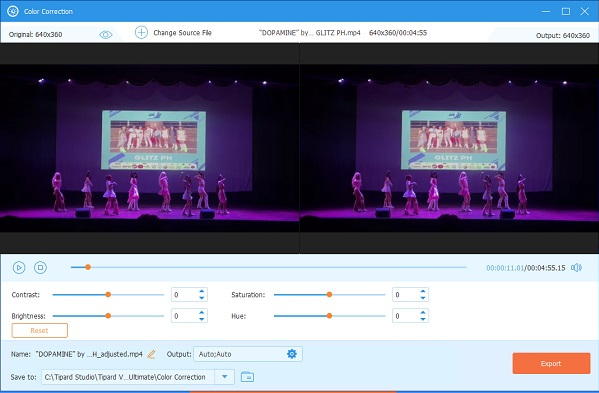
Step 4After you upload your video, choose a video color correction option to fine-tune its colors. You can adjust the slides for video contrast, saturation, brightness and hue to make the desired video correction. For finalizing, the tool displays a video preview to compare the effects of color changes per your requirement.
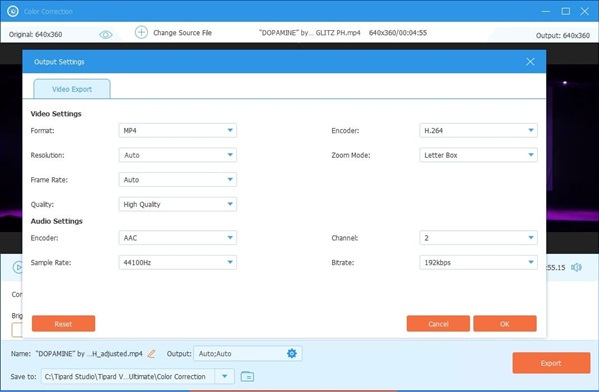
Step 5Continuing from the previous steps, click on the Gear button after adjusting the videos' color corrections and any other improvements that may be required. This will display the output setting. Choose the best options, such as video format, resolution, frame rate, quality, and more. Lastly, hit the Export button to download the changes on your computer.
Part 3: How to Color Correct Video in DaVinci Resolve
DaVinci Resolve is a professional software used by professional video editors and colored enhancers besides amateurs. Specifically, it has a "Color" button that contains tools such as color match, color wheels, curves, and windows. It provides you with a complete array of tools in an attempt to attain the right color balance and look in the videos you produce. Its Color tab holds color match options, color wheels, curves, and windows, among other tools. Below are the steps on how to color-correct video using DaVinci Resolve.
Step 1Go to the official site, and you'll find the newest version of DaVinci Resolve. Download it and follow the installation process. Once downloaded, launch the DaVinci Resolve software to begin the process.
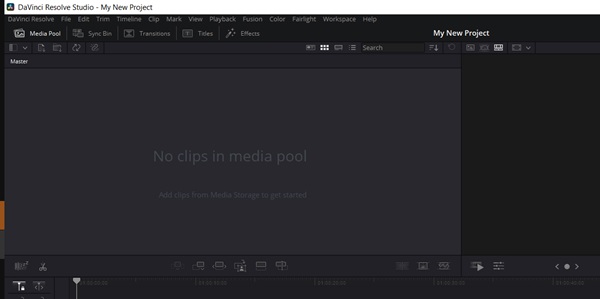
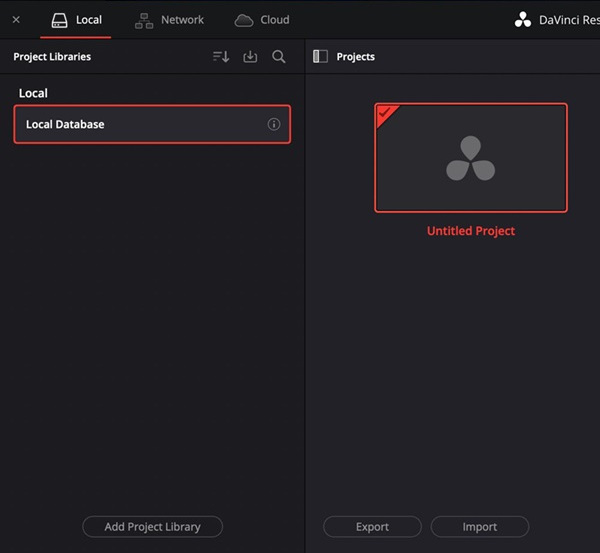
Step 2After opening DaVinci Resolve, to start a new project, right-click on the New Project button. Type the name of your project and click Create. To add your video clips to your project, go to the File option at the top of the screen and click on Import Media.
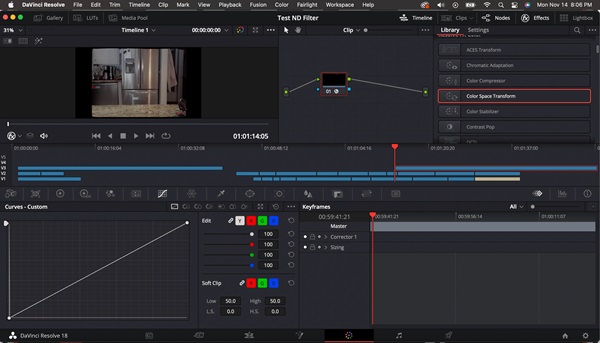
Step 3After importing your video files, you need to drag the necessary clip into the timeline. Next, move to the Color tab by clicking on the icon shaped like a color wheel at the bottom of the program. The Color page is home to every color correction task that will be carried out.
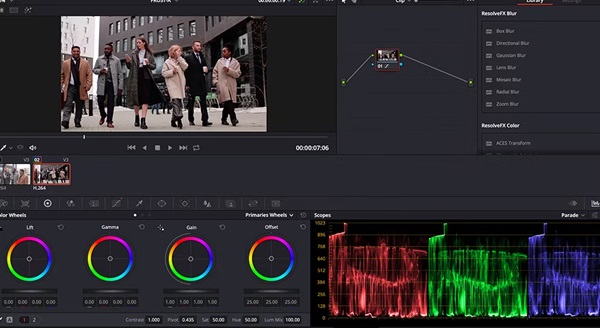
Step 4Begin with the first-order correction to scale the picture and bring it closer to the desired work. In the Color Wheels area, you can modify its Lift or shadows, Gamma or mid-tones, and Gain or highlights to adjust the general contrast and brightness. If further fine-tuning is necessary, you can use the Offset control to regulate the overall exposure. These can be adjusted in DaVinci Resolve to achieve optimal results, and the waveform and vectorscope features are powerful scopes in this effect.
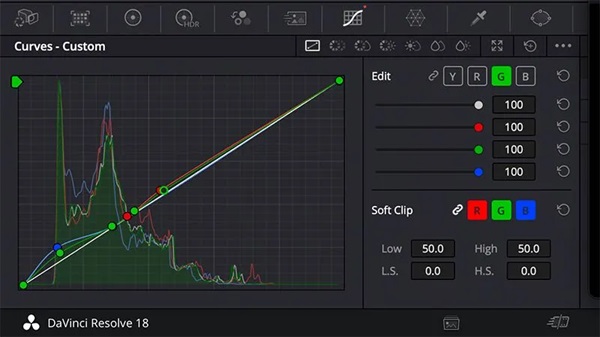
Step 5To fix the white balance, click on the Curves tab, hover on Color Match, and select a neutral color, the grey or white part of your video section. This automatically fixes the white balance. For saturation, you need to go back to the Color Wheels and move the Saturation bar to the correct position so that the color looks near natural.
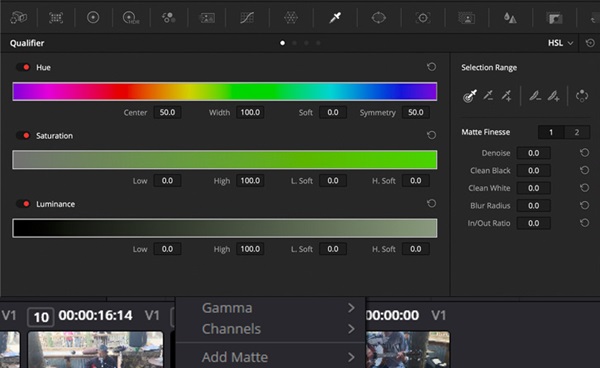
Step 6One of the tools in DaVinci Resolve is the Qualifier tool. Select this tool, pick the color or area you want to change and adjust the hue, saturation, and luminance to sample the color. After being separated, you can make further selections with the help of the Denoise and Clean Black / Clean White controls. The isolated color can be adjusted using the Color Wheels or Curves of that particular range, but the extreme change will not affect the other part of the image.
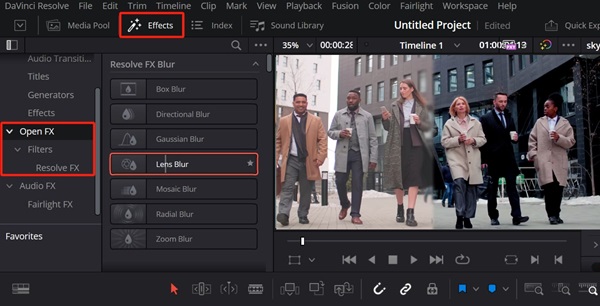
Step 7Lastly, to give the final touch, try applying a lighter vignette by heading to the Effects Library, opening the OpenFX, and then dragging the Vignette option over the clip. Change the properties of the vignette to your preference.
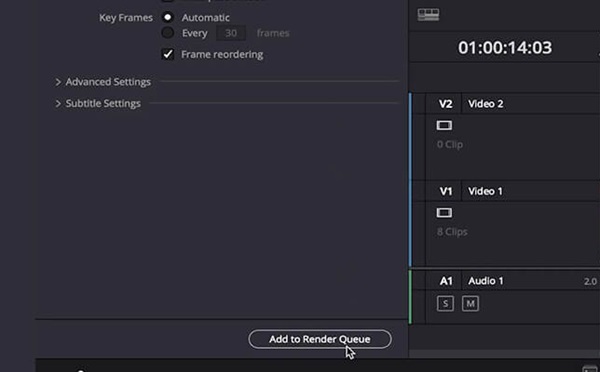
Step 8After you have corrected the color, click on the Deliver tab. Here, you can select the desired format, resolution, or frame rate export settings. Once you have customized your export settings, hit Add to Render Queue and then Start Render to export your brand-new color-corrected video.
Further Reading:
7 Best Color Correctors: How to Correct Video Color Easily
6 Effective Ways on How to Fix Blurry Videos Effectively
Conclusion
Fine-tuning videos with video color correction is used for anyone interested in enhancing the quality of their clips. That is why this article reviews the two best color correction tools and how they are used. One is the Tipard Video Converter Ultimate, which helps you make necessary video changes. So, keep the issues with colors from ruining the footage you have or worked hard to capture. Try Tipard Video Converter Ultimate now and make your video creations much better than they are now.


